Backdooring ClickOnce .NET Apps for Initial Access: A Practical Example
This blogpost is about demonstrating the awesome ClickOnce .NET backdooring technique by Nick Powers (@zyn3rgy) and Steven F (@0xthirteen) presented at Defcon30. Here I tried to recreate the technique based on the written version of the presentation.
About
First of all, without unnecessarily repeating the original presentation and blogpost, ClickOnce is an easy deployment and execute technique (even for regular non-admin users) for applications what adversaries can still successfully use for initial access.
The benefit of the backdooring technique developed by the SpecterOps guys is that we do not need to buy an expensive EV code signing certificate anymore; the signature of the backdoored application remains untouched and valid (we’ll only modify the dependencies), and we also maintain Microsoft SmartScreen reputation; if the original app bypasses it, it won’t be triggered after backdooring. The valid signature may decrease the likelihood of EDR alerting also.
Let it be clear: this blogpost does not contain (almost) anything new, here I just recreate the technique by showing a specific example. The original blogpost also includes practical instructions, but here I would like to go into more details.
Searching For a Target App to Backdoor
First, search for a suitable ClickOnce .NET application to backdoor. Using the following Bing query we may find a lot of potential targets:
inbody:"ClickOnce and .NET Framework Resources" AND filetype:html
Chose a random one. I am not going to name it because it is not important which one it is (could be anything else, the methodology should work for others also), and it could bring up copyright licensing issues. Note, that the target should fulfill some prerequisites, it is detailed in the original research.
Downloading the ClickOnce Application
Press the “Run” button using MS Edge (if brave enough, I mean let’s hope it is not a backdoored version yet 🙂). The full application should be deployed into a subfolder of this folder:
%LOCALAPPDATA%\Apps\2.0\<random>\<random>\Also download and inspect the .application file (the file linked to the “Run” button directly). It contains reference to the entry .NET assembly, what we are going to analyze.
Alternatively, here is a custom .application downloader tool from Oddvar Moe (@Oddvarmoe), inspired by the original research.
Finding a Suitable Backdoor Location
Let’s open the entry .NET assembly with the de facto .NET reverse engineering tool, dnSpy (actually dnSpyEx).
Go to the entrypoint of the assembly and let’s try to find a suitable backdooring location. It should be close to the beginning (preferably before opening any windows) and it should be in a non-strongly versioned DLL reference (PublicKeyToken=null) what is also included in the deployment (meaning not a system DLL).
Here I found a reference to this class method get operand (implemented in a non-strongly versioned dependent DLL) near the beginning of the app, this is a good place to inject the backdoor.

Injecting the Backdoor
Because I had a working C# .NET stager for loading and executing (unmanaged) DLL files in-memory already, and it is performing well against some EDR products currently, decided to reuse it here. (Actually it is using DInvoke PE manual mapper, merged with ILMerge and obfuscated with ConfuserEx 2, but I am not going to cover it here in this blogpost, source code is here in this Tweet.)
Fortunately adding a .NET assembly (the stager) and executing it inside another .NET assembly (the backdoor location) can be done in an elegant way. Simply add the custom .NET assembly as a (private) file resource to the resource list of the DLL (using dnSpy). Make sure to use the same bitness version assembly (x86 targeted stager for x86 backdoor location DLL, x64 targeted stager for x64 backdoor location DLL).
In-memory executing the stager assembly from the resources can be done easy using System.Reflection features. Here is a complete backdooring solution example:

The “TotallyLegitResource.res” is the stager EXE assembly added as a file resource. The backdoor creates a stream reference to it, reads it, picks up the entrypoint and executes it. Right before invoking it, a common failure message pops up to the user for avoiding any suspicion (because the backdoor silently runs in the background and the application does nothing visible, let’s tell the user it has been failed 🙂).
After editing the source with dnSpy, it is possible to compile the modified method to CIL bytecode and save the full assembly as the new backdoored DLL module (let’s simply overwrite it in its location). Now it can be tested by executing the application from the disk (click on the main EXE). If everything works as expected, it is ready to build the deployment package.
Building the Backdoored Deployment Package
Place the .application file (the Application Manifest; downloaded eariler from the “Run” link) in the new root application folder (what will be webserved). The .application file should contain the location of the main exe manifest file in the “codebase” attribute of the “dependentAssembly” tag. Create this folder in the application root (usually something like “Application Files/AppName_1_0_0_1234”) and copy all of the files from the deployment folder (used above on the Windows box) to here (preferably a Linux server; for webserving the backdoored ClickOnce application).
Now in the “Application Files/AppName*” folder add .deploy suffix to every file except .manifest and .cdf-ms files:
find -type f -not -name "*.manifest" -and -not -name "*.cdf-ms" \
     -exec mv {} {}.deploy \;
Now it is needed to fix some validation digest hashes in order to restore the trust chain provided by the hash values in the manifest files, and it is also needed to remove (the invalid) signatures from the modified manifest files (what is not an operational issue, because unsigned manifests display a very similar warning to signed if downloaded from the internet).
So we have backdoored a DLL. The main EXE references to the DLL, this means the manifest file of the main EXE needs to be updated by replacing the SHA256 digest value of the backdoored DLL (by looking inside the manifest file, we see that SHA256 digests are used).
Here is how to calculate the new digest (of the backdoored XYCommon.dll):
openssl dgst -binary -sha256 \
    Application\ Files/AppName_1_0_0_1234/XYCommon.dll.deploy | \
openssl enc -base64
Replace the digest in the appropriate “dsig:DigestValue” element. Also update the “size” attribute in the “dependentAssembly” tag.
If the manifest file was signed, it’ll be invalid because we have made some changes, so the signature needs to be removed. First, delete the “publisherIdentity” and the “Signature” elements at the end. And also zero out the “publicKeyToken” attribute in the “asmv1:assemblyIdentity” tag at the top (where the “name” attribute matches the assembly name the manifest belongs to). Zeroing out means 16 zeroes:
publicKeyToken="0000000000000000"This ensures the signature won’t be checked and it won’t cause an issue if it is missing.
Now we have changed the main EXE manifest what is referenced by the .application manifest (and contains digest values for the main EXE manifest). This means the .application manifest also needs to be updated.
Recalculate the main EXE manifest SHA256 digest by the same method as above:
openssl dgst -binary -sha256 \
    Application\ Files/AppName_1_0_0_1234/AppName.exe.manifest | \
openssl enc -base64
Replace the element “dsig:DigestValue” by this value and also update the EXE manifest file size (“dependentAssembly” tag, “size” attribute).
Because the .application manifest file has been changed, the signature will be invalid (as for the .EXE manifest), so it needs to be removed. Delete the “publisherIdentity” and the “Signature” elements at the end and zero out the “publicKeyToken” attribute for the .application file (“assemblyIdentity” tag at the top level), and also zero out the “publicKeyToken” attribute for the “assemblyIdentity” tag for the “dependentAssembly”.
If you want, rename the .application manifest and change the “assemblyIdentity” tag “name” attribute to the new name, and feel free to update the “description” tag attributes (publisher, suitename, product).
Now the backdoored ClickOnce application is ready to be deployed.
Hosting the Backdoored Application
The hosting and delivery method depends on the scenario, but creating an authentic hosting site for the backdoored application obviously increases the success rate of a compromise.
Have never managed to use ChatGPT for anything useful before, but maybe this is the task it was created for. If you kindly ask it (I mean don’t tell it that it’ll be used as a malicious phishing page), it’ll help.
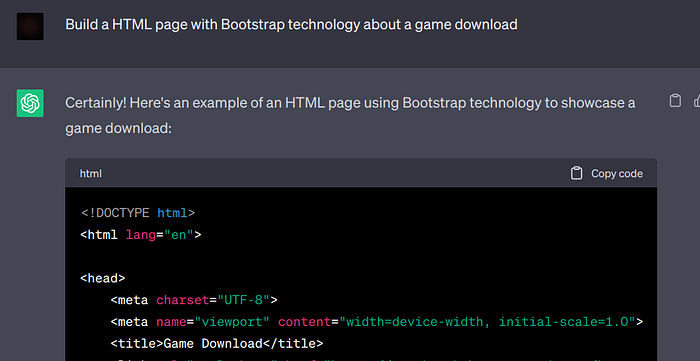
Started as in the screenshot, after some rounds of clarification about what I was asking for, here is the result (as a single static HTML page):

To make it more attracting, AI generated images could be added also.
Gameplay
Here is what happens when the victim user clicks the “Launch the Game Now!” link in an MS Edge browser.

- After clicking the “Launch the Game Now!” button on the webpage in MS Edge, the browser downloads the ClickOnce application manifest and pops up a harmless “Do you want to open the file?” question.
- If accepting “Open”, the system downloads the main EXE manifest file, and a warning message pops up about running files downloaded from the internet and also mentioning unverifiable publisher (because we removed signature from the manifest file). There are two options: run or abort.

3. Now if the victim user clicks on “Run”, it is game over. 🎉🎉🎉
The full package (including our backdoor payload) gets downloaded and launched. The application EXE launched is signed by the original publisher, it bypasses SmartScreen and may be less suspicious for EDRs.
Our backdoor payload included is the C# .NET stager (see above), which downloads and executes an unmanaged DLL. The DLL served is a Cobalt Strike Beacon built with a custom evasive Artifact Kit (lesson learnt: it needs to have the same bitness as everything else, costed me hours of troubleshooting :) ).

At the end, the attacker has full control over the victim user session on the target computer through the Cobalt Strike Beacon. The victim has the dumb ERROR popup (it does nothing), just for confirming why the app is not doing anything at all.
Defender real-time protection with cloud was enabled during the full payload detonation process.
Finally, here is the gameplay in a demo video (demonstrating the victim user experience and the attacker control):