How FBI hackers or Forensics Team identify fake Images
Hello learners, I am back with my new and very interesting blog on how the FBI or any other crime department identifies fake images. So you might have seen in those serial killing suspense movies how the FBI hackers identify the fake images, looks cool right? If Yes then be ready with me to learn about it. So without further ado let’s dive it.

But before starting let me give you a good news that I started a youtube channel for cybersecurity students where they can learn cybersecurity from the beginning to advance and trust me you’ll not find content like this on Youtube before. https://youtube.com/@securedsyntax that’s the link for the channel so enjoy and learn Hacking with Me.
Generally, we or the criminal uses editing software like adobe photoshop, picart ….etc. But as we all knew “No matter how clever a thief is, he always makes a mistake.” and we as a hacker needs to identify that mistake.
I will provide you 11 mistakes which made by a thief or anyone would make while editing, Sometimes a good editor also makes that mistakes.
So here we go…….
1. Focus on the Edges
Some while editing use the magical wand kind of functionality to remove the background which results in lack of finishing and we can Identify the image is fake. For more understanding just take a look at the picture below.
See how the edges are poorly cut by the editor. But more clear cutoff is also seems odd check out second image and see the cutoff is so linear and easily identified.

Now you learnt about the first mistake done by criminals or anyone lets move to the second one.
2. Check for Reversed text
Sometimes editor wants to match the background and they flip the image without thinking about the text. See the image below.

Lady reads a newspaper but if you look carefully the text are reversed and you can easily identify the image is not real.
3. Examine the Shadows
Shadow is the important part of an image to reach the great level of editing it implants finishing to the picture but only if it has been done correctly. Now this challenge is for you identify the problem in the image shown below.
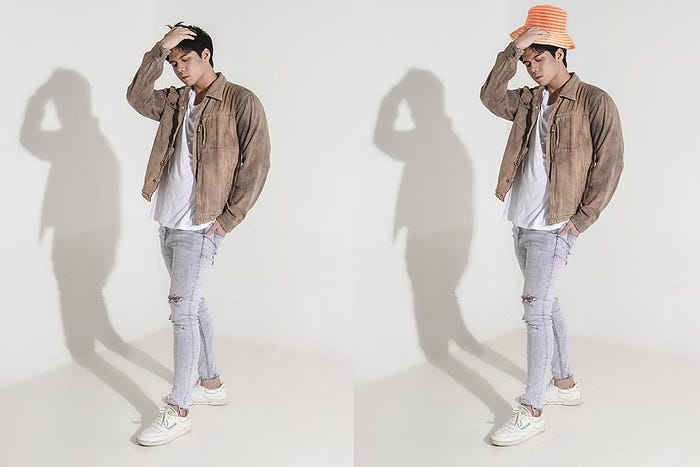
I know this is one is so simple to identify, the person on the right wear a cap but the cap’s shadow is not there. this is the most common mistakes a editor do.
4. Absence of Reflections
Some pictures are clicked on the shiny surfaces which means that the object placed in that shiny surfaces will show the reflection but if the editor fails to show that reflection correctly then this is the mistake we need to identify. Check the image for more understanding.

See every object has its own reflection instead of the blue bottle. The blue bottle is nicely placed by the editor but he/she forget about the reflection and he/she got caught.
5. Bad Perspective
This mistake is done by various editor because it needs expert to handle that. Perspective means here about the position and camera angle. See the image below for more understanding.

You can see that the image added by the editor is not matching with the background as the ground level and camera angle of the background’s table and the lady’s table is different.
6. Look for the sign of cloning
Cloning is done by most of the editor to reduce their effort on editing. it Reduces the effort but it increases the chance of risk to be identified. Check the image below and comment me how many duplicate you have discovered.
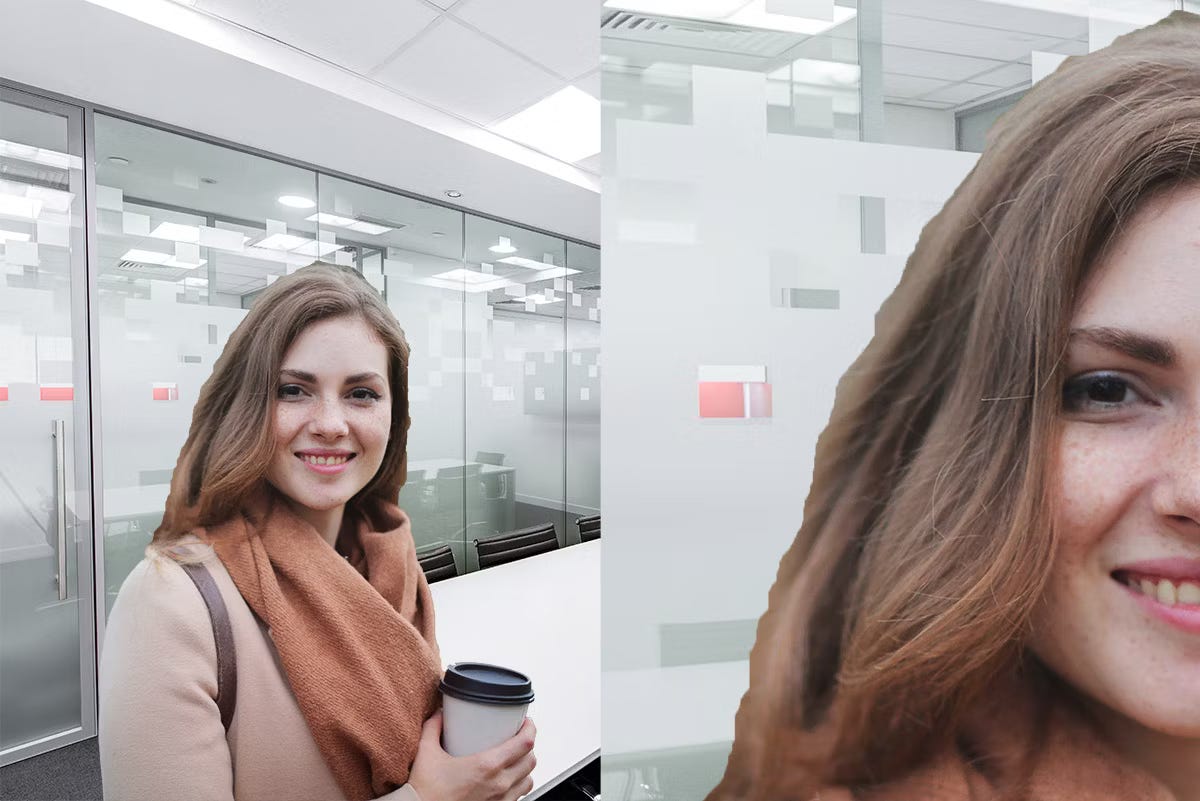
7. Zoom in will reveal
This is the best and the easiest way to identify fake images because zooming in a image will show the detailing part of the image if any irregularity is observed then congratulation you found a fake image sometimes students edit their certificates name for marks or medical report for leave but a simply zoom in can reveal them. See the screenshot below to for better understanding.

At glance you are not able to identify the mistake but if you look carefully on the zoomed side it is badly cutoff and just placed.
8. Look for Inconsistent Lighting
Lighting is the most important thing in a picture but if the editor doesn’t aware with it then this will happen see the image below.

See How the person wearing suite looks odd here because of the lighting all the characters here has the same angle and same side of reflection but the person wearing suite looks very different from the surrounding. ALL BECAUSE OF LIGHTING.
9. Look for badly Deleted Objects
Sometimes a editor deletes the objects but accidentally left some impression of that object see the image below how editor badly delete a person by leaving the hands on the girl’s shoulder.

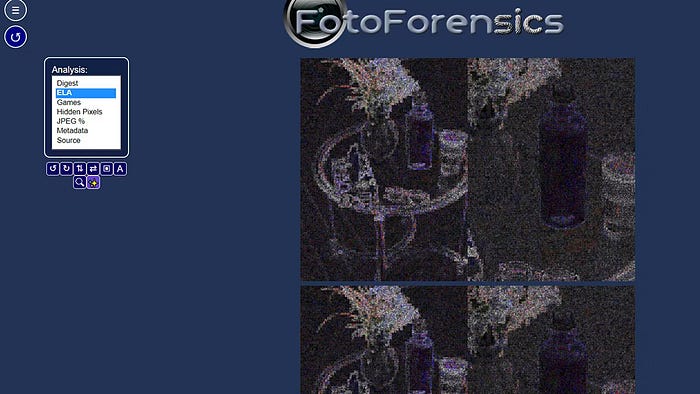
10. Use Reverse Image Searching and forensics tools
This is the technical process to identify the mistake and they are used when the editor is too smart and left no visible mistake then the tools like Fotoforensics comes into picture and reverse image search can also be used to find out the real image through internet by google images or TinEye.
FotoForensics is used by many of the department to identify the mistake in the picture by checking every single pixel.
So I hope you enjoyed this blog and learn something new. So support me on Youtube and learn things about cybersecurity.
Till then keep learning, keep exploring and do hacking………………………

