How to unpack UPX packed malware with a SINGLE breakpoint
Dynamically unpacking UPX payload from memory.
What is UPX?
Ultimate Packer for eXecutables (UPX) is a free and opensource executable packer.
This usually is short for “runtime packers” which are also known as “self-extracting archives”. Software that unpacks itself in memory when the “packed file” is executed. Sometimes this technique is also called “executable compression”. This type of compression was invented to make files smaller. So users wouldn’t have to unpack them manually before they could be executed. But given the current size of portable media and internet speeds, the need for smaller files is not that urgent anymore. So when you see some packers being used nowadays, it is almost always for malicious purposes. In essence to make reverse engineering more difficult, with the added benefit of a smaller footprint on the infected machine. ~ blog.malwarebytes.com
Frequency of UPX in malware
Actually, it’s pretty low, UPX is a relatively very simple and well-documented packer and you don’t want that as malware author. But still, we see some low life malware using UPX as the only packer and some intermediate malware using it in their second or nᵗʰ stage.
In my limited experience as a cybersecurity student, I’ve seen it enough times to conclude that this trick is still relevant.
Setup
To make sure this trick still works with the latest UPX version available (release 3.96), I created a small application in C++ and then packed it using UPX, then unpacked it using this trick and compared the results.
Creating a simple payload
A small program which asks for a integer x and gives x*x ,
Statically linked, PEBear analysis -

And looks like any other typical C++ code in IDA,

Packing with UPX


Notice the sections are reduced to only 3- UPX0,UPX1 and UPX2. Also, the size of the file is reduced (63.34% compression ratio) and let’s see the final IDA call graph for reference.

One Breakpoint Trick
You can do this with any debugger, I am going with x32dbg for this one.
x32dbg will put a breakpoint at PUSHAD or EntryPoint of your binary by default — (we will discuss at last what PUSHAD does.)

Step 1 (searching):
Load the binary in your debugger and search for POPAD instruction.
Step 2 (setting BP):
Look for next JMP immediately after POPAD and set your breakpoint there.

Step 3 (finding OEP):
Run the program till it hits JMP breakpoint

Now single step into the JMP, this will take you to the OEP (Original Entry Point) of the packed binary.
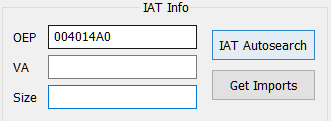
We get 004014A0 as our OEP, now we will extract this unpacked binary from this OEP.

Dumping unpacked PE and fixing Import Table
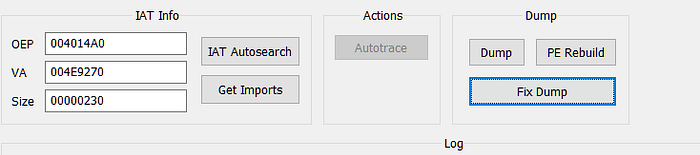
Now we will dump the PE starting from its OEP, for this I am using Scylla plugin for x32dbg,

If you are using the same, click on this ‘S’ button in your toolbar.
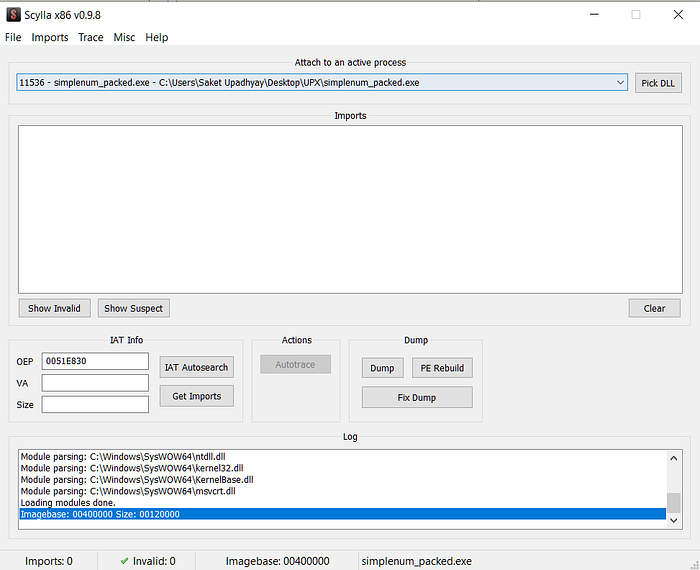
Pick your current process in ‘Attach to an active process’, and make sure your OEP is correct, let’s fix that in our case -
Then click ‘IAT Autosearch’ to scan for Imports.
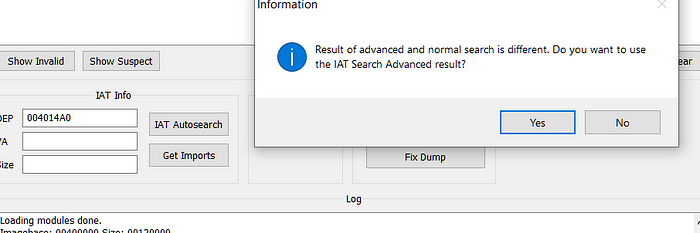
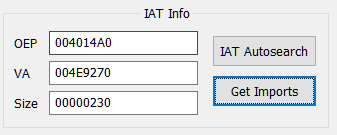
Click ‘Yes’ when it askes for advanced result. When completed, click on ‘Get Imports’ to list all the imports found.
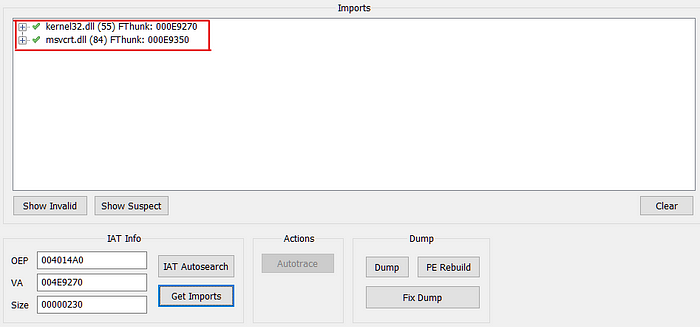
Then click on ‘Dump’ to dump the extracted binary.

and finally click ‘Fix Dump’ and choose recently dumped binary to fix its IAT.

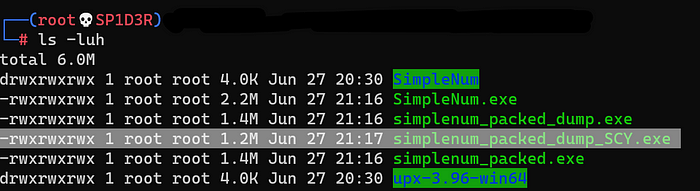
In our case simplenum_packed_dump_SCY.exe is the final unpacked binary, to check it let’s open it in IDA and compare the call graphs.
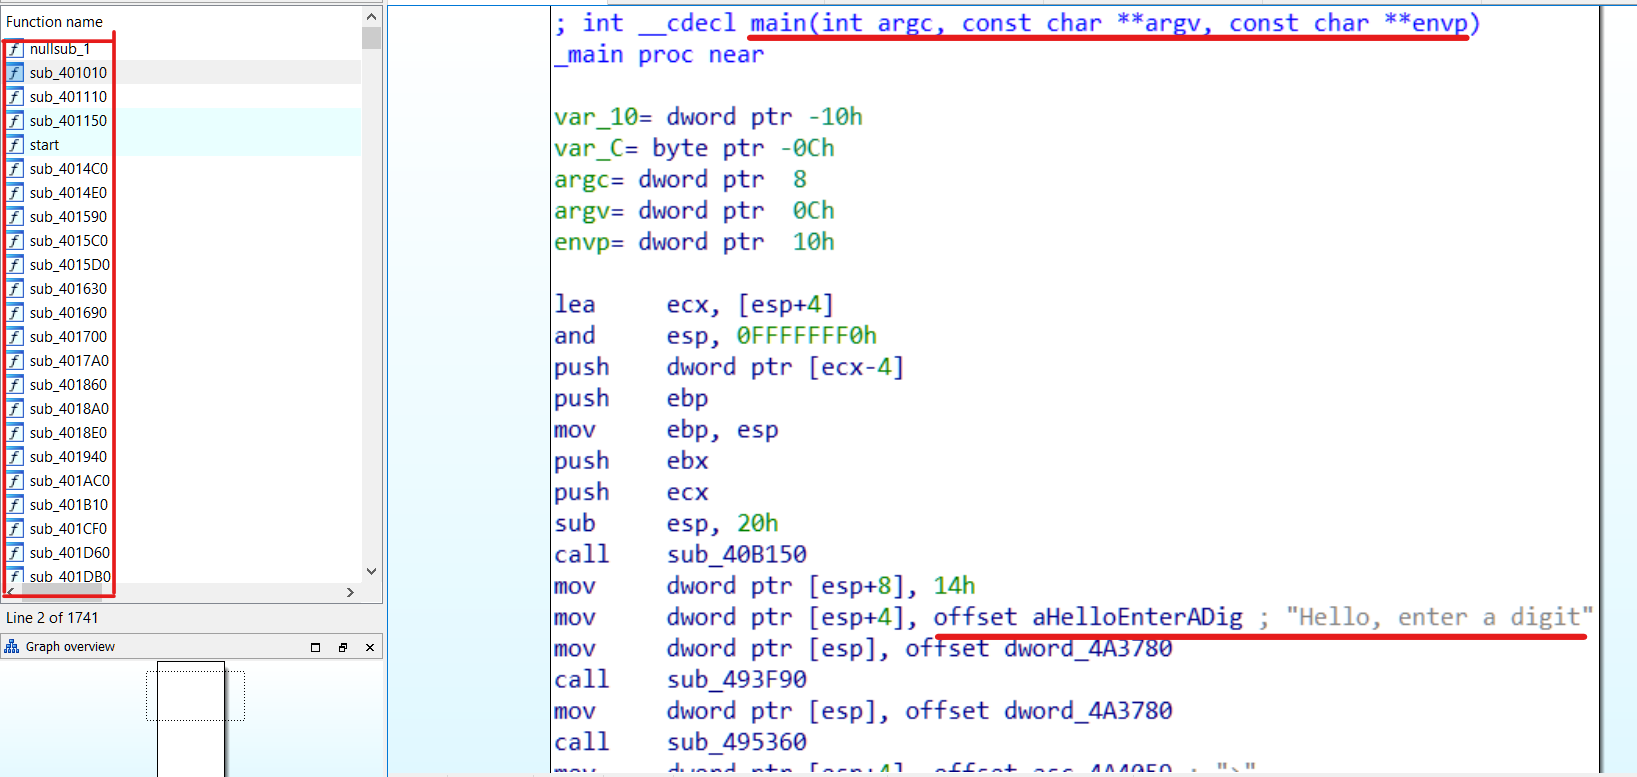
We can see all the original strings and similar program structure! Our method is complete here, but if you want you can read further to know why this works.
Why this works?
This is the result of a well known UPX property, when you pack any Executable with UPX, all existing sections (text, data, etc) are compressed. After compression, these are named UPX0, UPX1 etc. Then it adds a new code section at the end of the file which will decompress all the packed sections at execution time.
During execution it follows following steps -
- Saves all register states with PUSHAD
- Unpacks all section in memory
- Dynamically resolve IAT
- Restore the register state using POPAD
- Jump to OEP and execute main code.
In our trick, we put breakpoint just after step 5, when it has jumped to OEP, and we dump the PE from there and fix IAT without completing the execution.
Conclusion
With some practice and experience, you can easily find this JMP to register in the call graph without searching for POPAD, and you can quickly unpack any upx binary.
Why not use UPX tool itself to unpack?
Because sometimes you might get UPX packed binary in the second or third stage of malware, mostly it will be memory injected and ‘mapped binary’ hence UPX tool will not work, but this is a discussion for another article.
In this tutorial we walked you through a UPX packed binary, if you’re interested in learning how to unpack other types of packers, checkout Guided Hacking’s Unpacking Tutorials