Learning Linux & InfoSec Principles Using OverTheWire’s Bandit — Part 1
Begin learning Linux using a fun, online “wargame”
Introduction
OverTheWire is a community website aiming at educating users about security concepts. It offers several online machines, whereas each is called a “wargame”, to help us “learn and practice security concepts in the form of fun-filled games”.
The goal of this article is to provide you with a practical and enjoyable way of getting to know the Linux operating system (particularly the bash shell). Later on, we will also cover some Information Security concepts. We will do it by solving the tasks of the bandit machine provided by https://overthewire.org/.
Bandit is the most essential machine the OverTheWire.org website has to offer, designed to introduce people to basic Linux commands and information security ideas.
According to the official website:

Level 0
The first task (level 0) of this machine is to access it using SSH. SSH stands for Secure Shell, and it is a protocol designed for remote command execution. It is usually active on port 22, but this is not mandatory — any free and open port will suffice.
To remotely connect to a machine using SSH, we can use the Linux ssh command. Its syntax is as follows:
ssh {username}@{host}This command will try to login to user on the specified host (can be either a hostname, such as www.google.com, or an IP address), on the default SSH port (remember? Port 22).
But wait a second, our challenge clearly states that the relevant port for us is port 2220. How can we change the default port for the ssh command?
On Linux, adding “ — help” (dash,dash) to most commands will provides us with some instructions and tips regarding how to use this certain program:
ssh --helpThe result:

We can gather that using the -p option, we are able to change the default port. The task’s instructions set the username & password to “bandit0”. So our command should be:
ssh -p 2220 bandit0@bandit.labs.overthewire.orgWe will be prompted with some text, and after typing “yes”, a password will be required. Entering “bandit0”, we successfully log into the server (notice that although you type the password, no characters will be displayed — it’s completely normal):

Hurray! Level 0 is done. To continue:
Once logged in, go to the Level 1 page to find out how to beat Level 1
Level 0 → Level 1
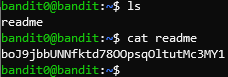
Our task in level 1 is to find the password for the next level in the readme file, located in the home directory. In order to navigate to a folder in Linux, the cd command should be used. The home directory can be abbreviated using the ~ sign:

To show the files contained in this folder, we can use the ls command. We can see that there is a single file called readme, and we can reed its content using the cat command, as follows:
Level 1 → Level 2
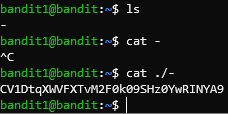
Now, let’s log into bandit1 on the target machine, and use the password we have just found. Our current objective is to read the password to the next level from a file named “-”. We can ls and see the file is indeed in our current directory (also called working directory). But executing “cat -” doesn’t produce any output.
A quick google search will reveal that the cat command treats the dash sign as a synonym for stdin (the standard input stream), and to overcome we can type “cat ./-” instead, whereas “.” means the current directory (working directory, remember?) and the / is used to access its content:
We have found the password, so let’s continue to the next level.
Level 2 → Level 3
Again, log into bandit2 in the target machine using the acquired password.
The password for the next level is contained in a file called spaces in this filename. Using ls, we can gather it’s located in our working directory. Well, as you might have guessed, let’s just cat it!
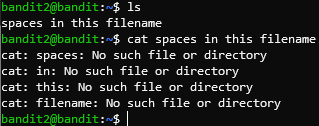
An unexpected error! The reason for this is that the Bash Shell uses the space as a delimiter between different commands and parameters. To override this behavior, we can precede every space with a \:
cat spaces\ in\ this\ filename
Works like a charm! Collect the password and continue to Level 3.
Level 3 → Level 4
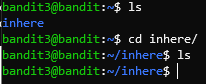
The next necessary file is said to be located in the inhere directory. Once again, using ls we can see the inhere directory is under our current folder in the directory tree. As I mentioned earlier, we can use the cd command to enter it.
We are in the correct directory, but where is the file? OverTheWire’s level instruction state that the file is hidden, which means it won’t be displayed, unless special parameters are used. The required parameter for the ls command is the -a:
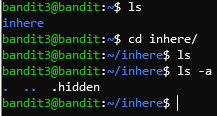
Remember what does the . filename mean? Take notice that in Linux, hidden files are filenames that begin with a dot. I guess that by now you know how to read the password and progress to level 4.
Level 4 → Level 5
The goal in this level is to grab the password from the single human-readable file (that is located in the inhere directory). It is also suggested to use the reset command to “repair” the terminal.
Once inside the relevant directory, we can see there are 10 files, all in the format of -file0X, whereas X ranges from 0 to 9. All the files begin with a dash, so pay attention to the format of the parameters for the cat command.
Let me show you another tip: using Wild Cards in Linux, which is similar to Regular Expressions. To express that any character/s can be in a certain positions, the * (asterisk) can be used, taking advantage of the name format of the different files.

You probably already notice the password, but let me show you another great Linux tool, called strings. Evidently, many characters in these files cannot be read by us humans. The strings command takes text as input and extracts its excerpts that are human-readable. We can use the pipe redirection (|) to take the output of the cat command and set it as the input of the strings command.

We have the password. Please make sure to ignore the preceding M, since it was added to the string due to the way cat’s output is formatted, so the password is koRe……
Now we are headed for the last level of this post. Use the password we have just achieved and connect to bandit5.
Level 5 → Level 6
Our current goal is to find a human-readable file, which is 1033 bytes in size and not-executable.
In order to check the size and the permissions of all the files in the inhere directory, we can use a parameter of the ls command, the ls -l. It extends the output and shows more data.
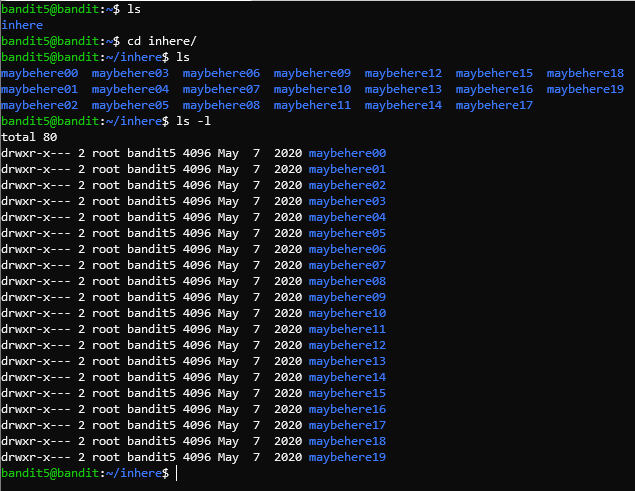
Take a look at the d that precedes every line of output that was generated by the ls -l command. It means that the following file is a directory! Since we search for a file, and there are too many folders for us to check manually, we can add the -R option to the ls command, and perform a recursive traversal.
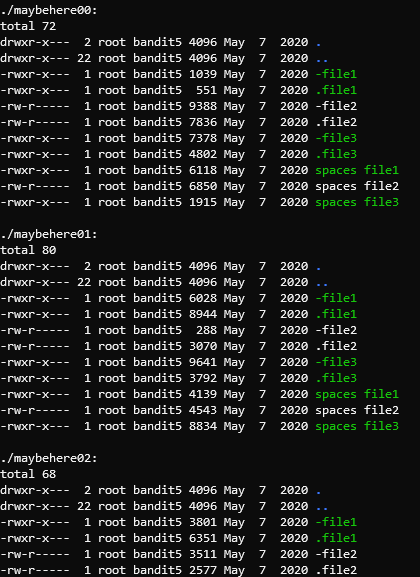
Our output looks similar to this. This is a lot of text, so lets use one of the most sophisticated tools Linux offers to filter this input: grep.
We can pass input to grep using the pipe redirection (|), with which you are already familiar by now. I remind you our target file is of 1033 bytes in size. The size of the file is displayed in the ls -laR command right before the date. So let’s use grep to search for this file:

Now we know that the filename is .file2 (a hidden file!), but we do not know where it’s located. To find out, we can add yet another parameter to the ls command, the filename we wish to be displayed. Remember, because all the files are inside directories, we will need to use the * Wild Card in place of the folder, to abbreviate all of them:
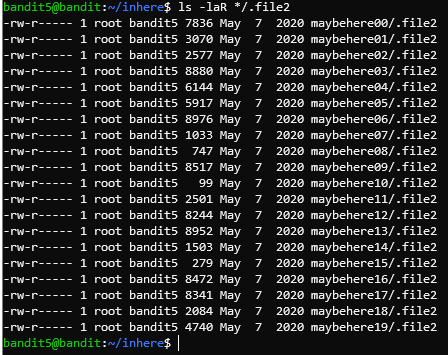
No we have the list of files named .file2. We can grep it again, to view only the requested one.

Remember the requisition of a not executable? Notice the first column — these are the permissions for the file. We would take a deep look into them in later tutorial, but the absence of the letter X testifies that it is not currently possible (permitted) to execute the file.
Let’s enter maybehere07, and read .file2. We have successfully achieved the password! Keep it ’til the next post…
Conclusion
Goodbye for now. Have a great time until then, and may the coming Gregorian New Year will bring welfare and happiness to all of us!
