Reverse SSH SOCKS proxy via Alpine image
Introduction
Penetration testing often involves encountering fully restricted machines within the target network, whether it be a VPN network, an office LAN, or any other environment with stringent access controls. These machines lack admin or sudo access, making it challenging to utilize tools or install new ones.
However, almost every Windows or Linux machine comes with SSH (Secure Shell) installed. In this article, we will explore a method that allows you to quickly and securely set up a reverse SSH proxy, particularly useful for testing internal web applications.

Requirements
To follow along, you’ll need two machines: your local PC, equipped with all the necessary testing tools, and a remote machine that has a connection to the target network but is fully restricted. Additionally, we’ll be using Docker to create a more secure environment for setting up the SSH tunnel.
Creating a Container on the Local Machine
Let’s start by creating an empty folder on the local machine. In this folder, create a file named “Dockerfile” with the following content:
FROM alpine:3.17
ARG ROOT_PASSWORD
RUN echo ‘root:’$ROOT_PASSWORD | chpasswd
RUN apk update && apk add openssh openrc
RUN ssh-keygen -A

RUN sed -i ‘s/#\?PermitRootLogin.*/PermitRootLogin yes/’ /etc/ssh/sshd_config \
&& sed -i ‘s/#\?GatewayPorts.*/GatewayPorts yes/’ /etc/ssh/sshd_config \
&& sed -i ‘s/#\?AllowTcpForwarding.*/AllowTcpForwarding yes/’ /etc/ssh/sshd_config \
&& mkdir -p /run/openrc \
&& touch /run/openrc/softlevel

ENTRYPOINT [“sh”, “-c”, “rc-status; rc-service sshd start; /bin/sh”]
Once you have saved the Dockerfile, open a terminal in the current directory and build the Docker image. Make sure to replace {ROOT_PASSWORD_HERE} with the desired root password. It is crucial to remember this password as it will be used for the SSH connection. Use the following command to build the image:
docker build --build-arg ROOT_PASSWORD={ROOT_PASSWORD_HERE} -t rev_proxy .
After successfully building the image, run a container based on the image with the following command. This command will forward the SSH port and a custom port for the SOCKS proxy:
docker run -d — name ssh_reverse_proxy -p 2223:22 -p 8888:8888 -i rev_proxy

Setting up the reverse proxy
Now that the container is up and running on the local machine, it’s time to establish the reverse proxy. On your remote machine, open a command prompt and connect to the container using port forwarding.
Replace {IP} with the IP address of your local machine with the Docker container. Use the following command, specifying the password you set during the build step:
ssh -R 0.0.0.0:8888 root@{IP} -p 2223 -v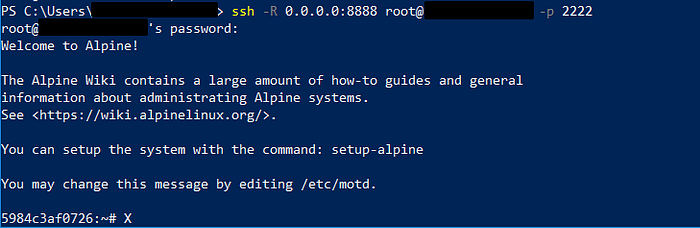
Using the proxy
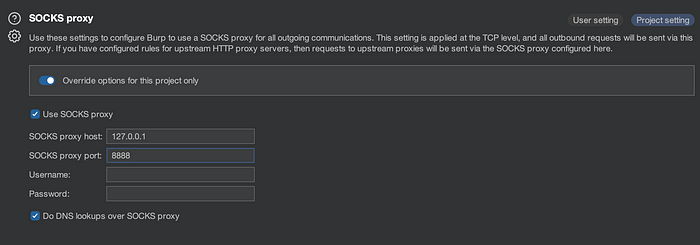
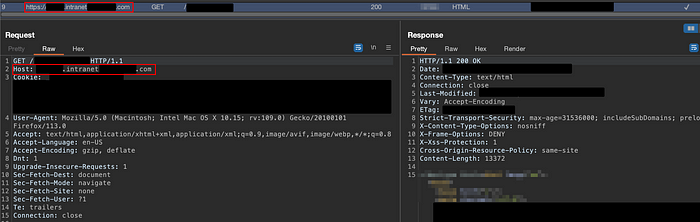
With the reverse proxy successfully established, you can now configure your local Burp Suite for testing. Open BurpSuite on your PC and navigate to the proxy settings. Set the Upstream SOCKS proxy to 127.0.0.1:8888 and ensure the option “Do DNS lookups over SOCKS proxy” is enabled. By doing this, you will be connected to the target network through the reverse proxy.
If you wish to proxify other tools, you can make use of proxychains-ng:
Conclusion
In conclusion, when conducting penetration tests, encountering fully restricted machines within a target network can pose challenges. However, by leveraging the built-in SSH functionality available on both Windows and Linux machines, it is possible to set up a reverse SSH proxy for testing purposes. This method allows you to access internal web applications and extend your testing capabilities even in restricted environments.
By using Docker as a more secure approach, you can create a container on the local machine and establish an SSH tunnel. This tunnel acts as a bridge between your local machine and the restricted machine within the target network. The reverse SSH proxy allows you to route your network traffic through the tunnel, enabling you to interact with internal resources.
🌐 My social networks: https://linktr.ee/s_novoselov