TryHackMe- Bounty Hacker CTF Writeup (Detailed)

Welcome folks!!
We are going to do Bounty Hacker CTF on TryHackMe.
I always start off my CTF by creating a directory of CTF on Desktop and Nmap directory within the CTF directory.

Let’s dive in!! Enjoy the flow!!
Task 1. Living up to the title.

#1.1 Deploy the machine
Ans: No answer needed
Nmap Scan:
We are going to do nmap scan on the target IP and enumerate services, versions, ports running on the target.
nmap -sC -sV -oN nmap/bountyhacker <TARGET_IP>
- -sC : Default scripts
- -sV : Version detection
- -oN : Output to be stored in the directory ‘nmap’ you created earlier

There 3 ports open on the box:
21/ftp- vsftpd 3.0.3 (Anonymous FTP login allowed)
22/ssh- OpenSSH 7.2p2
80/http- Apache/2.4.18
#1.2 Find open ports on the machine.
Ans: No answer needed
I won’t rush into FTP immediately. Instead, I will prefer to check the page on port 80 to assess the attack surface.
Navigate to URL http://<TARGET_IP> and have a look at the page.

This is just a page. Few of you may be thinking Spike,Jet,Ed,Faye could be a username. I thought the same. You know what let's write those names down in vim or text editor just in case we get stuck in a rabbit hole and start banging on doors to get a shell. Lol. I hope it won’t happen.
Its always good to check the source code of the page for any interesting information laid out that could be helpful in our enumeration process.
View Source of the URL page . Ctrl+U

Nah! Nothing got my attention. Looks normal. No hidden text in white. No comments. No hashes. Moving on..
How about we quickly start a gobuster scan on the target IP to find hidden directories for us to explore.
Gobuster:
gobuster dir -u http://<TARGET_IP> -w <PATH_TO_WORDLIST>
- -u: Specify URL
- -w: Specify wordlist

Additionally, you can use more flags in gobuster:
- -q: quiet, silent scan. Will hide banner.
- -o: Output to be stored in the directory
- -x: Search for extensions e.g. html,txt,php,phtml etc.


Nah!! Nothing so far was valuable to us. Therefore we will proceed. Save the .jpg file. Maybe this picture could have some hidden information embedded into. Also known as “steganography”. Steg tools could help us or not. Maybe we could be wrong. We will find out or there won’t be need to as what lies ahead in ftp could give us a clear direction.
Let’s start to enumerate FTP. Noted that it has anonymous login allowed perhaps we could find something interesting there. Fingers crossed.
ftp <TARGET_IP>
Log in as anonymous

Do ls to list files. Verify doing ls -la to see if there any hidden files for us to grab before we exit. We don’t have any currently but still, it’s a good habit to do so.
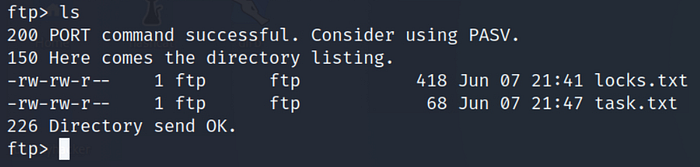
There are two files. Both are .txt and somehow locks.txt is looking tasty right now to me. I feel it could be a hint for passwords or maybe users on the box. Let’s transfer/download the files to our system and find out. Simply use the command:
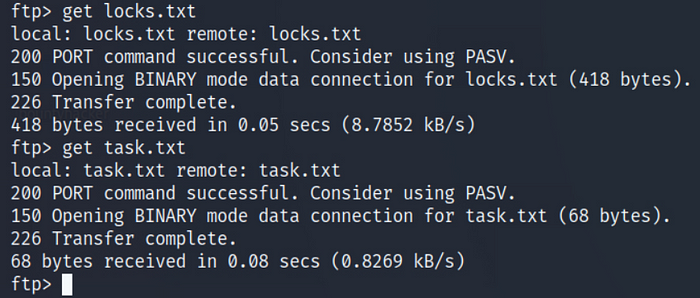
>get locks.txt
>get task.txt

cat locks.txt or less locks.txt
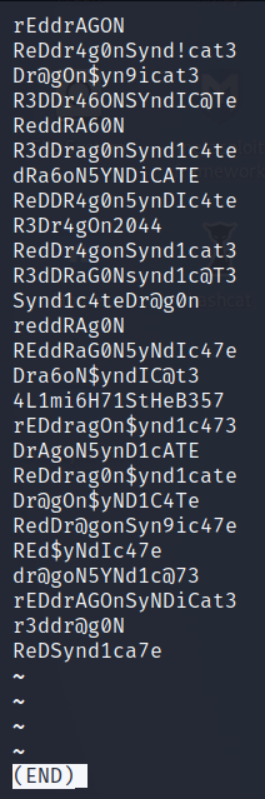
As I hoped. The file locks.txt is a list of a combination of potential passwords. The file could be quite useful for us when brute-forcing and can be possibly used as a wordlist. Let’s check the other file.
cat task.txt or less task.txt
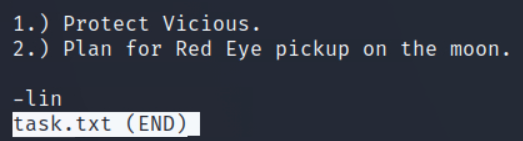
Awesome! We can see there is a user/name “lin”.
Good going so far!
#1.3 Who wrote the task list?
Ans: lin
What do we have?
A dictionary
A username ‘lin’ + (A couple more from URL)
A port open 22/ssh
That means we can try brute-forcing SSH with Hydra.
#1.4 What service can you bruteforce with the text file found?
Ans: ssh
Hydra is an amazing tool for cracking passwords and it supports a lot of services for brute-forcing.
Let’s spin up hydra.
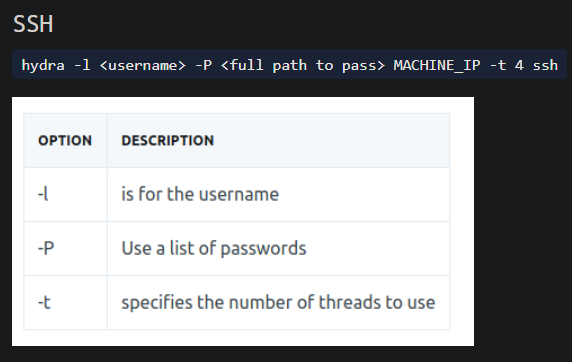
hydra -l <USER>-P <PATH_to_WORDLIST> <TARGET_IP> -t 4 ssh

Yay!! We got the password to do ssh into lin’s account.
#1.5 What is the user’s password?
Ans: XXXXXXXXXXXXXXXX
SSHing now.

It indeed work fine. Excellent!!
ls and we get our user flag.

#1.6 user.txt
Ans: XXXXXXXXXXXXX
What now left is to find a way to escalate our privileges on the box to become root and eventually capture root flag.
Try using the command:
sudo -l

Superb! Now we know that the user lin has the permission to run the /bin/tar as root. That could be immensely helpful for us to escalate privileges.
My first spot is to always go to https://gtfobins.github.io/ look for possible privilege escalation commands for elevating the privileges for a specific binary with special permissions.
Search tar in the search bar and click on tar scroll down to SUDO.


Always read the description. It looks pretty good to me. Can’t resist running it and getting root. Let’s see. Fingers crossed.
sudo tar -cf /dev/null /dev/null — checkpoint=1 — checkpoint-action=exec=/bin/sh

We have successfully elevated our privileges.
We can confirm we are root now.
Got one last thing to do and we are done.
Get our root flag.
Pretty easily we can get our root flag.
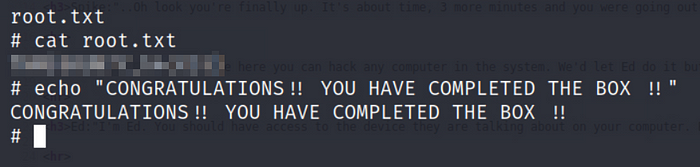
!!MARVELLOUS!! WELL DONE!!
#1.7 root.txt
Ans: XXXXXXXXXXXXX
Now we don’t need those names we had saved for reference later from the URL. Some information looks important but they aren’t exactly. Keeping note of everything along is a good habit.
This is my life’s second CTF writeup in a single day. What led me to write another one is the amazing response and feedback I received from my recently published ‘RootMe’ CTF Writeup. The response to that was so overwhelming I just couldn’t resist doing one more guided detailed writeup for you all especially for beginners. My writeups are specifically designed for beginners to learn and develop a methodology of their own over practice, experience, and time.
It was indeed a lot of fun. I hope you enjoyed reading through it.
If you liked the writeup or the writeup has helped you in any way possible, let me know in the comments or sharing the love by claps.
Submitted as a part of October PentesterLab giveaway
Follow me on Medium.
Thanks for taking out the time.
Take Care, Stay Safe, and Keep Hacking!
-Hassan Sheikh